
Contents
1. BaroPAM app
1.1 Install BaroPAM app
1.2 Using the BaroPAM app(Menu selection)
1.3 Using the BaroPAM app(Login information)
1.4 Using the BaroPAM app(Identity verification)
1.5 Using the BaroPAM app(Server information)
1.6 Using the BaroPAM app(Environment settings)
1.7 Using the BaroPAM app(Information sharing)
1.8 BaroPAM App FAQ
1.9 BaroPAM Integration API
2. BaroPAM website
2.1 Using the BaroPAM web(Membership registration)
2.2 Using the BaroPAM web(Login)
2.3 Using the BaroPAM web(Login information management)
2.4 Using the BaroPAM web(Server information management)
2.5 Using the BaroPAM web(PIN information management)
2.6 Using the BaroPAM web(Access log management)
2.7 Using the BaroPAM web(Abort & Logout)
3. About BaroPAM
1. BaroPAM app
Download for BaroPAM app's Android phone (https://play.google.com/store/apps/details?id=com.baro.pam), which is a generator of disposable authentication key to be entered in "Verification code" when logging in to information assets. In Google's "Play Store", the iPhone is available in Apple's "App store", and the installation is the same as that of a normal app.

The BaroPAM app is available for Android 6.0 (Marshmalliw) API 23, iOS 13.0 or higher, and does not support landscape mode.
If you cannot download and install the "BaroPAM" app for Android from Google's "Play Store", you must download the apk from the following address and install the "BaroPAM" app manually.
Korean version: http://nuriapp.com/apk/app_baropam.apk
English version: http://nuriapp.com/apk/app_baropams.apk
1.1 Install BaroPAM app
Downloading and installing the "BaroPAM" app proceeds as follows.
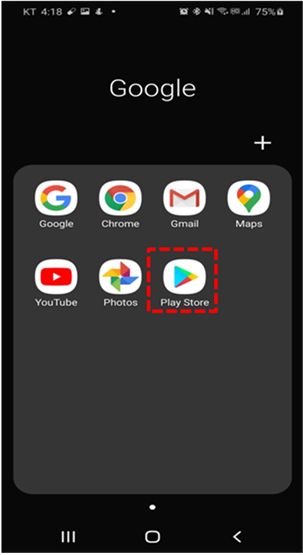
1. Click the "Pay Store" or "App Store" icon on your smartphone.
For Android phones)
For iPhones)

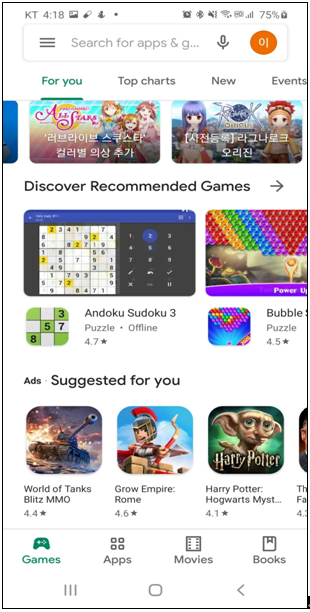
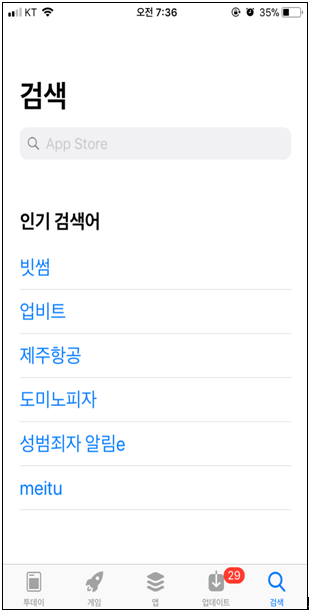
2. Google "Pay Store" or Apple "App Store" is activated as follows.
Google "Pay Store")
Apple "App Store")
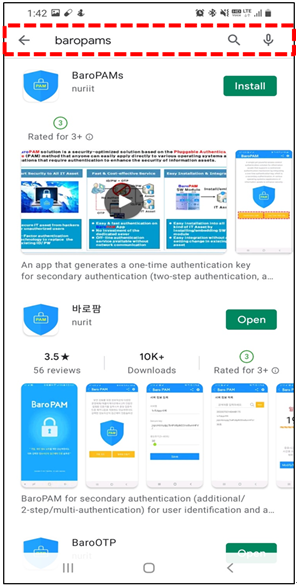
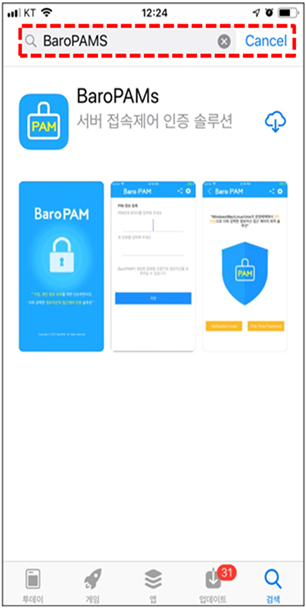
3. Enter "baropams" in the search field at the top and search for "BaroPAMs" app.
Google "Pay Store")
Apple "App Store")
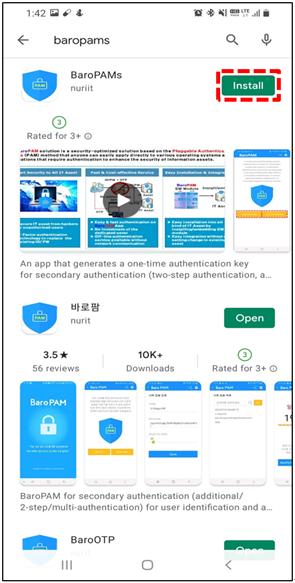
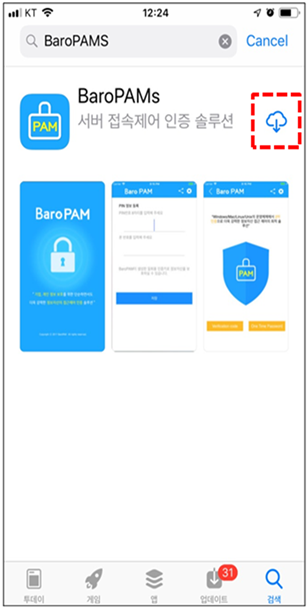
4. After checking the information of the "BaroPAMs" app, click the "Install" or "Receive" button.
Google "Pay Store")
Apple "App Store")
5. Download and install the "BaroPAMs" app as follows.
Google "Pay Store")

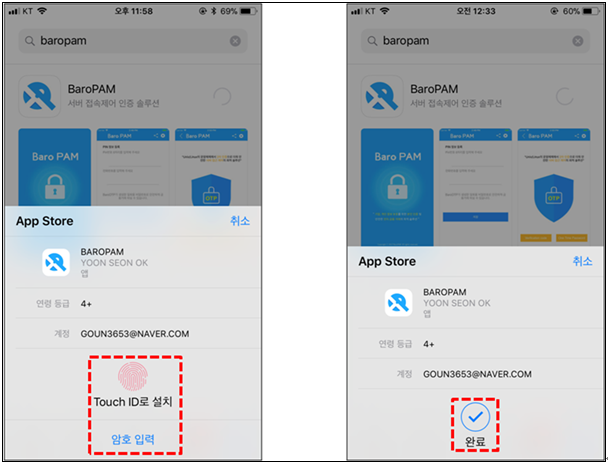
In the case of the Apple "App Store", the installation proceeds after completing the following.
6. When the installation of the "BaroPAMs" app is completed normally, the following "BaroPAM, BaroPAMs" icon is added to the smartphone.
Google "Pay Store")

Apple "App Store")
After installing the "BaroPAM" app, you must set up a more convenient password auto-completion function from iOS12 (Go to "Settings" -> "Passwords" -> "AutoFill Passwords" of the iPhone and allow "BaroPAM").
7. For Android phones, click the "Settings" icon as follows to set the permissions for the "BaroPAM" app. (In case of iPhone, steps 8~11 do not need to be performed.)
For Android phones)
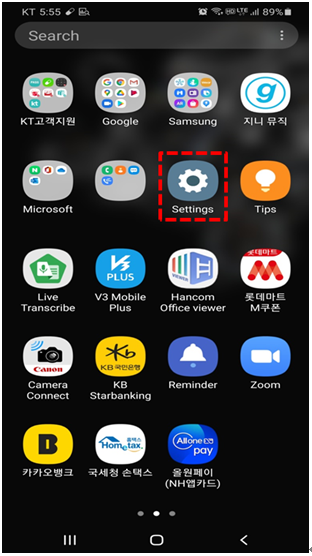
In the case of an Android phone, a one-time authentication key(OTA key) is not generated unless the permission is set.
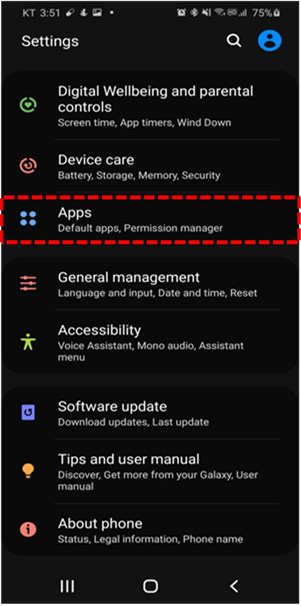
8. Among the icons on the "Settings" screen, click the "Apps" icon as follows.
For Android phones)
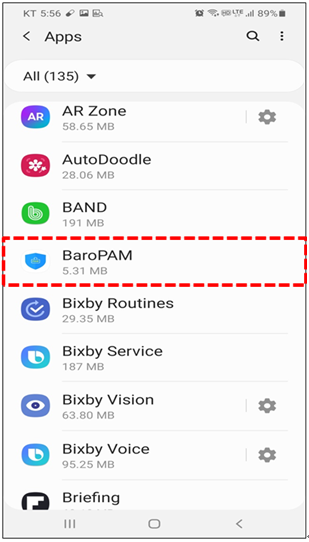
9. On the "Apps" screen, click the "BaroPAM" icon as follows.
For Android phones)
10. If you select "Permissions" on the "App info" screen, a screen to set "App Permissions" appears.
For Android phones)
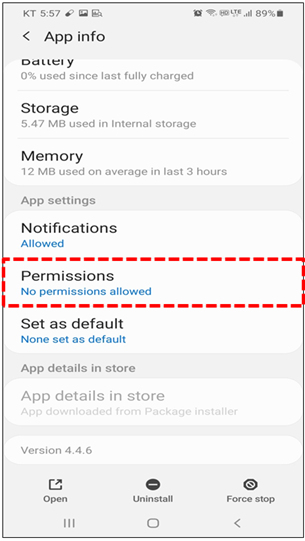
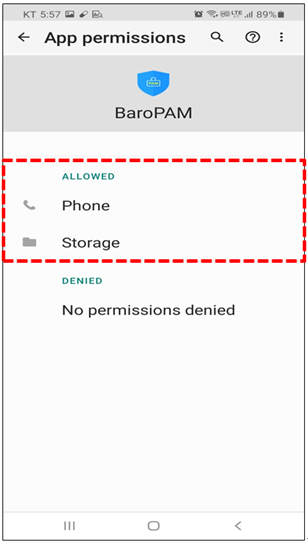
11. On the "App Permissions" screen, change "App Permissions" from "Storage" and "Phone" from off to on.
For Android phones)
Since the " BaroPAM " app uses the time synchronization method, the time setting of the phone is very important, so the time should be set automatically as follows.
For Android phones: "Settings"->"Date and time"->"Automatic date and time" and "Automatic time zone Auto"
->"Allow".
For iPhones: "Settings"->"Date and time"->"Automatic date and time"->"Automatically set"->"Allow".
"BaroPAM" app is largely composed of comfirm yourself, menu selection, login information, server information, environment setting, and information sharing.
1.2 Using the BaroPAM app(Menu selection)
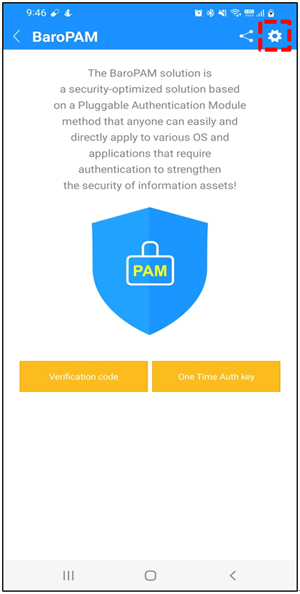
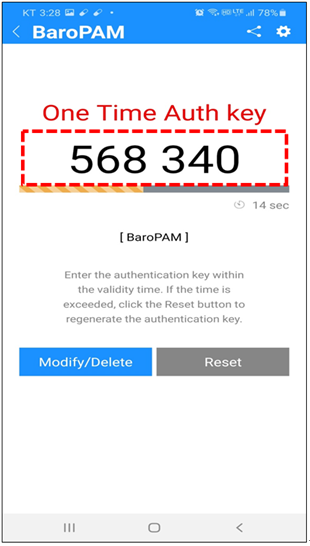
1. When the "BaroPAM" app is activated, a screen to select "Verification code" and "One-Time Auth Key" appears as follows.

"Verification code" is used when generating a OTA key used to access information assets, and "One Time Auth key" is used to replace the password of the application login screen with a OTA key.
First, when the "One Time Auth key" button is clicked, if the application log-in information exists, the "List of login information" screen appears. If no information about the application log-in exists, the "Register login information" screen appears.
1.3 Using the BaroPAM app(Login information)
1. When the "One Time Auth key" button is clicked on the "Menu selection" screen above, the "List of login information" screen appears if the login information exists, and the "Register login information" screen appears if the login information does not exist.
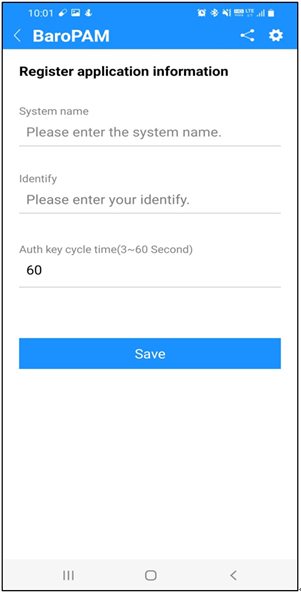
▣System name
The system name to log in is a required field. You can enter at least 1 digit and up to 30 digits.
▣Identify
Identify is a required field and you can enter at least 1 digit and up to 50 digits.
▣Auth key cycle time(3~60 second)
Auth key cycle time is a mandatory input item and can be specified for a minimum of 3 seconds and a maximum of 60 seconds.
If the generation cycle (Auth key cycle time) of the BaroPAM verification module is different from the authentication cycle (Auth key cycle time) specified in the app, a OTA key may be different and login may fail. Can be.
2. After entering the login information, click the "Save" button.
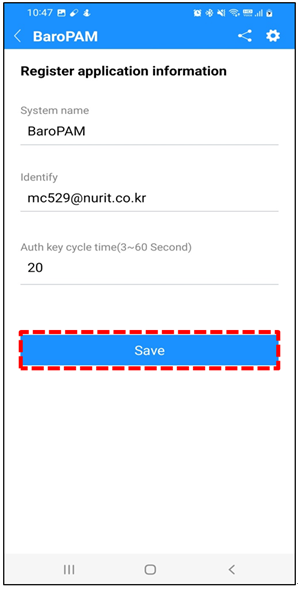
Clicking the "Save" button first checks the validity of the input items and then proceeds to save the login information.
If the system name is not entered, the message "Please enter the system name." appears on the screen.
If identify is not entered, the message "Please enter your identify." appears on the screen.
If the auth key cycle time is not entered or is out of range, the message "Please enter or confirm the auth key cycle." appears on the screen.
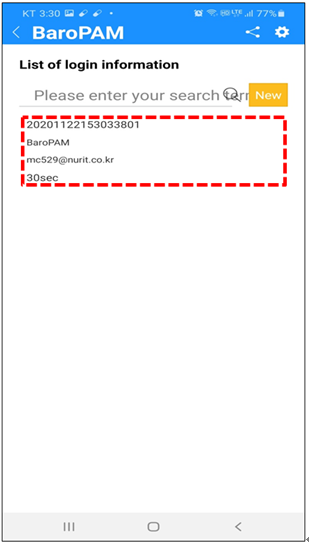
3. If the login information storage is not completed normally, the "Register login information" screen continues, and if it is completed normally, the "List of login information" screen appears as follows.
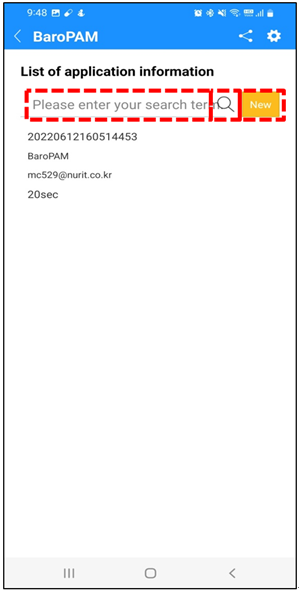
If you want to search for login information, enter a search term and click the "Search" button to display the searched login information on the screen.
If you need to add new login information, click the "New" button and a screen to register login information appears.
4. If you need to generate a second authentication key (OTA key), click the login information item in the login information list as follows.
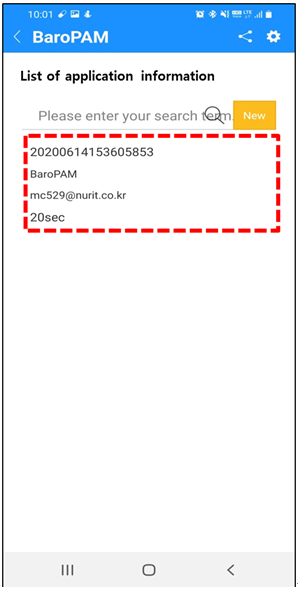
In the "List of login Information", click the login information item to generate a secondary authentication key (OTA key). Unlike an Android phone, if you do not go through the identity verification process, the iPhone cannot obtain device information due to its own security. It is necessary to apply a separate identification function to prevent unauthorized use of another person's phone number only in the case of an iPhone because there is no such thing as an iPhone. (refer to "1.4 Using the BaroPAM app(Identity verification)") is called.
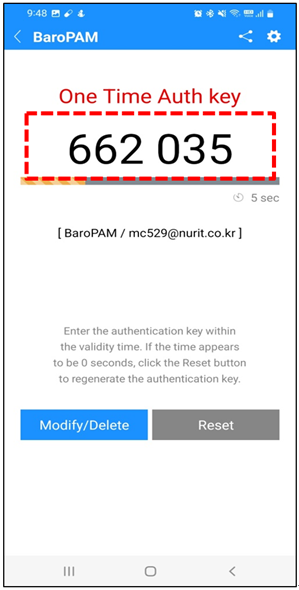
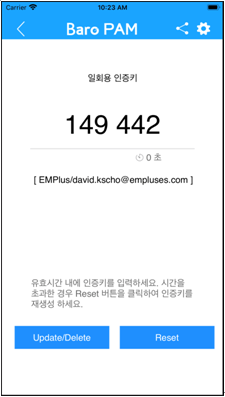
5. Then, a screen for generating a second authentication key (OTA key) based on the login information appears as follows.
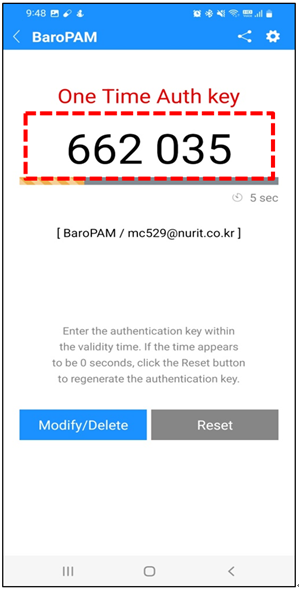
If you need to proceed with the modification/deletion of login information, click the "Modify/Delete" button.
During the same authentication key cycle time, the "Reset" button is deactivated, and when the authentication key cycle time passes, the "Reset" button is activated.
When the activated "Reset" button is clicked, a new secondary authentication key (OTA key) is generated, and the same secondary authentication key (OTA key) is generated during the one-time authentication key generation cycle (Auth key cycle time).
Note) If you click the number "662 035", which is the generated OTA key, the OTA key is regenerated in the same way as clicking the "Reset" button..
6. If you need to modify or delete login information, click the "Modify/Delete" button and the following screen will appear.
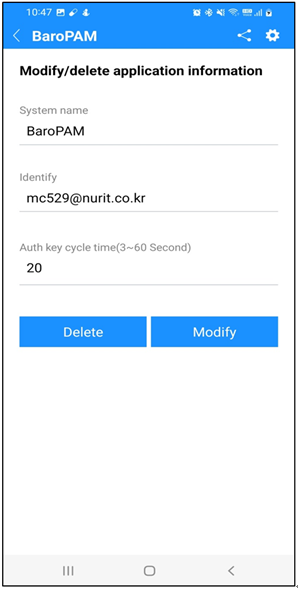
▣System name
The system name to log in is a required field. You can enter at least 1 digit and up to 30 digits.
▣Identify
Identify is a required field and you can enter at least 1 digit and up to 50 digits.
▣Auth key cycle time(3~60 second)
Auth key cycle time is a mandatory input item and can be specified for a minimum of 3 seconds and a maximum of 60 seconds.
If the generation cycle (Auth key cycle time) of the BaroPAM verification module is different from the authentication cycle (Auth key cycle time) specified in the app, a OTA key may be different and login may fail. Can be.
Clicking the "Delete" button proceeds to delete the login information.
When you click the "Modify" button, the first step is to check the validity of the input items and then modify the login information.
If the system name is not entered, the message "Please enter the system name." appears on the screen.
If Login-ID is not entered, the message "Please enter Login-ID." appears on the screen.
If the auth key cycle time is not entered or is out of range, the message "Please enter or confirm the auth key cycle." appears on the screen.
If the login information modification or deletion is not completed normally, the "Modify/delete login information" screen continues, and when completed normally, the "List of login information" screen appears.
1.4 Using the BaroPAM app(Identity verification)
1. For iPhone
Unlike Android phones, when you select the login information item to generate the secondary authentication key (OTA key) on the "List of login information" screen because the device information of the iPhone phone cannot be obtained, the screen does not move to the "One Time Auth key" creation screen.
In addition, in order to prevent unauthorized use of other people's phone numbers, it is necessary to apply a separate identity verification function. In the "BaroPAM" app, its own algorithm is applied and the identity verification procedure is executed as follows.
Unlike Android phones, the iPhone cannot obtain device information due to its own security, so it is necessary to apply a separate identity verification function to prevent unauthorized use of other people's phone numbers only in the case of iPhone. The "BaroPAM" app uses its own algorithm. By applying, the identity verification process is carried out as follows.
1) In "List of login information", click the login information item to generate a secondary authentication key (OTA key).
2) If you have not performed the identification process, the following screen for identification appears.
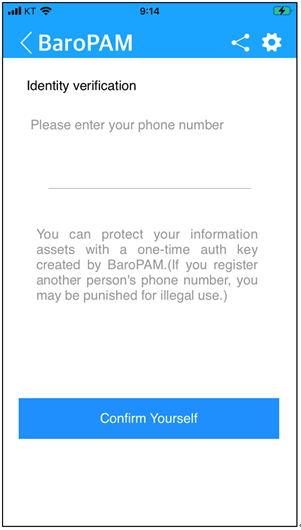
3) Enter the iPhone's phone number as a number and click the "Confirm Yourself" button.
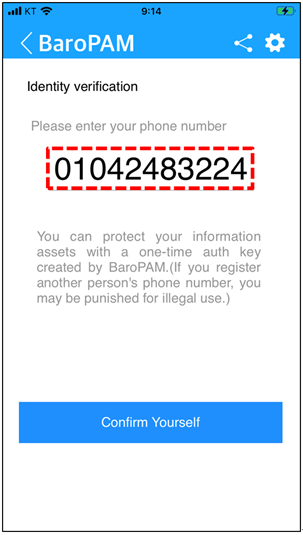
If you click the "Confirm Yourself" button, you first check the validity of the input items and then proceed with the verification work for your phone number.
If the phone number is less than 8 digits, the message "Please enter more than 8 digits of phone number." appears on the screen.
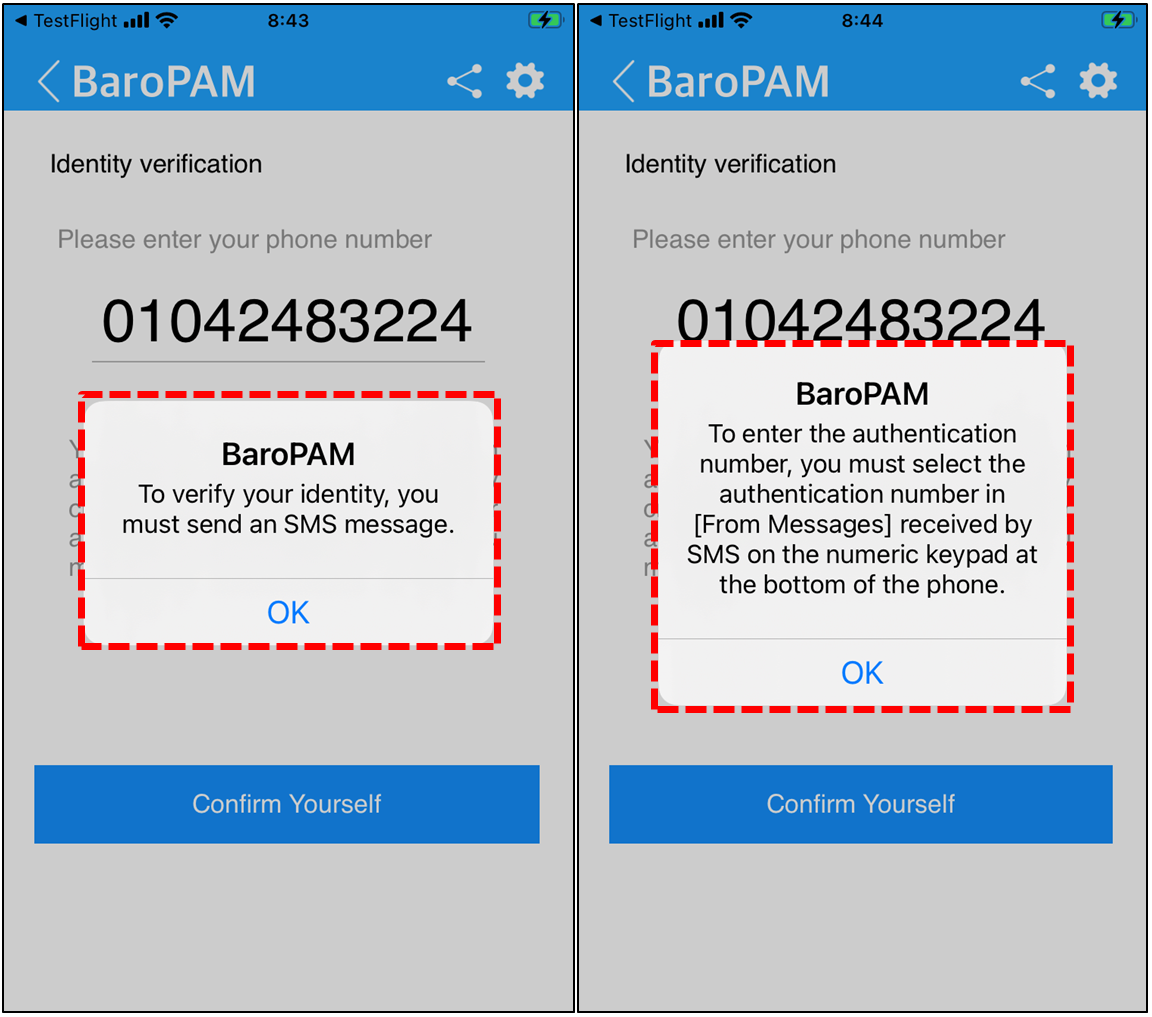
4) When it is completed normally, the OTA key is generated by an internal algorithm to check whether it is the user's phone number, and then click the "Send SMS" button on the next screen to transmit the generated OTA key to the input phone number.
If you enter someone else's phone number, you may be punished for illegal use.
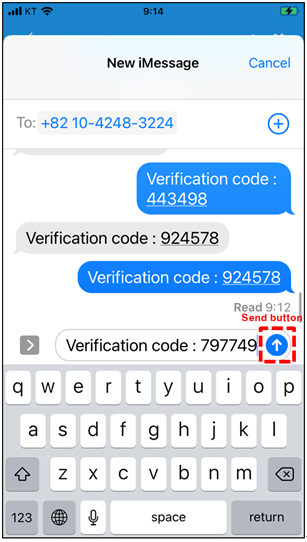
5) Then, the OTA key sent by SMS is displayed on the keyboard at the bottom as follows.
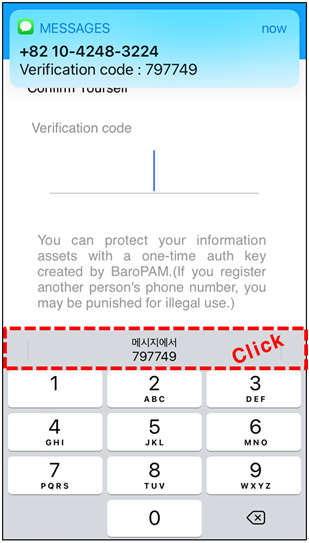
If you click the OTA key displayed on the keyboard, the internal OTA key verification module proceeds to store the phone number after verification.
If the OTA key is not displayed on the keyboard like the screen above, be sure to set up a more convenient password auto-completion function from iOS12 (Go to iPhone's "Settings" -> "Passwords" -> "AutoFill Passwords" -> "Allow") Confirmation should be done.
If you enter OTA key directly without sending SMS, "To verify your identity, you must send an SMS message." or "To enter the authentication number, you must select the authentication number in [From Message] received by SMS on the numeric keypad at the bottom of the phone." appears on the screen.
Note) If the OTA key sent by SMS is received but it is not displayed on the keyboard or the OTA key sent by SMS is not received.
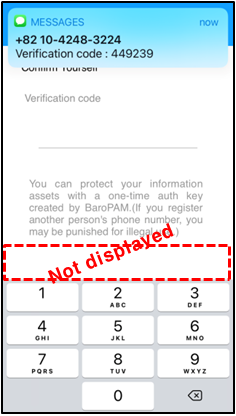
As shown in the screen above, if the OTA key sent by SMS is received but it is not displayed on the keyboard or the OTA key sent by SMS is not received, press the message in the center of the screen for more than 5 seconds as follows.

If you press the message in the center of the screen for more than 5 seconds, a window for registering an urgently issued temporary verification code appears as follows.
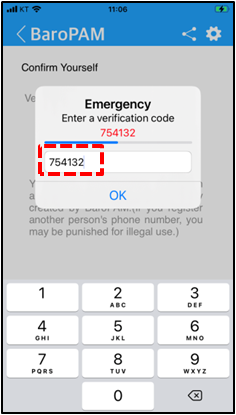
After entering the "Verification code" displayed on the screen within 15 seconds and clicking the "OK" button, the internal verification module proceeds to store the phone number after verification.
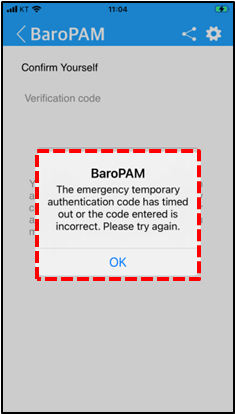
If the urgently issued temporary verification code verification fails, the following message appears on the screen, and urgently issued temporary verificiation code verification must be performed again.
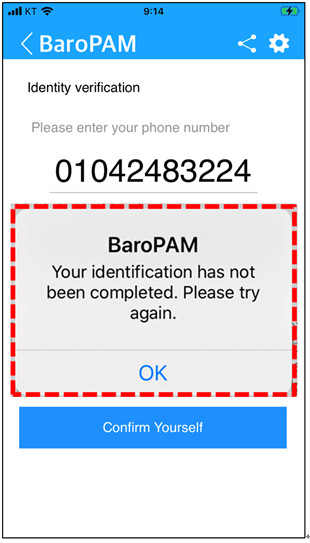
6) If the identity verification process fails, the following message appears on the screen, and the identity verification process must be performed again.
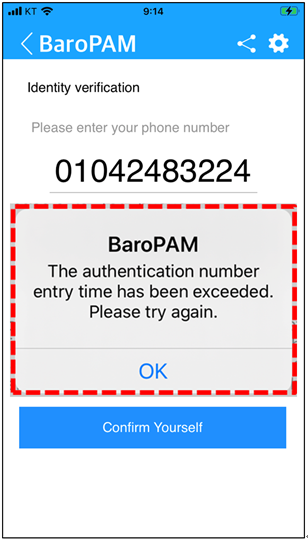
7) If the OTA key input time exceeds 10 seconds during the identity verification process, the following message appears on the screen, and the identity verification process must be performed again.
2. For Android phone
When you select the login information item to create a secondary authentication key (OTA key) on the "List of login Information" screen because the device information of the Android phone cannot be obtained, you may not go to the "One Time Auth key" creation screen. have.
In addition, it is necessary to apply a separate identity verification function in order to prevent unauthorized use of another person's phone number. The "BaroPAM" app applies its own algorithm and performs the identity verification procedure as follows.
1) To configure the "BaroPAM" app, click the "Preferences" icon as follows.
2) Then the "Preferences" screen appears as follows.
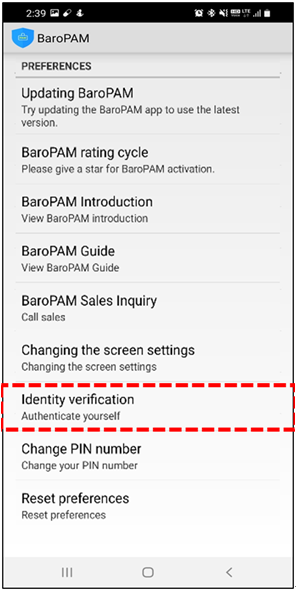
3) If you click the "Identity verification" item, the following "Identity verification" screen appears.
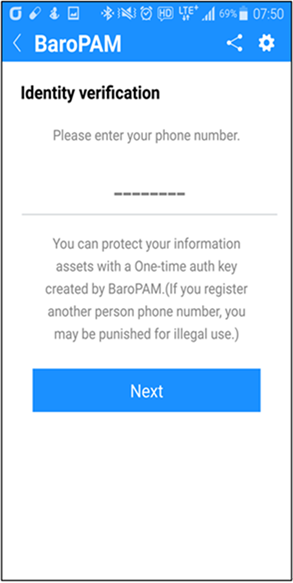
4) Enter your phone number as a number and click the "Next" button.
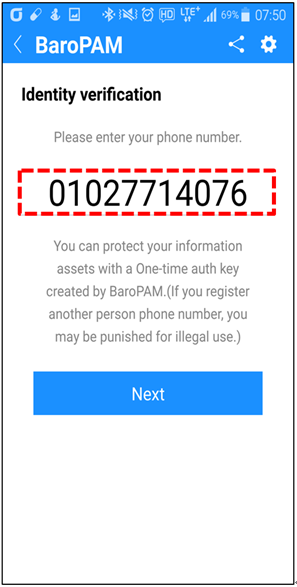
Clicking the "Next" button first checks the validity of the input items, and then delivers the verification code generated by the internal algorithm to the "Identity Verification" screen to proceed with the identity verification process.
If the phone number is less than 8 digits, the message "Please enter more than 8 digits of phone number." appears on the screen.
If you enter someone else's phone number, you may be punished for illegal use.
5) After checking the received verification code, click the "Confirm Yourself" button.
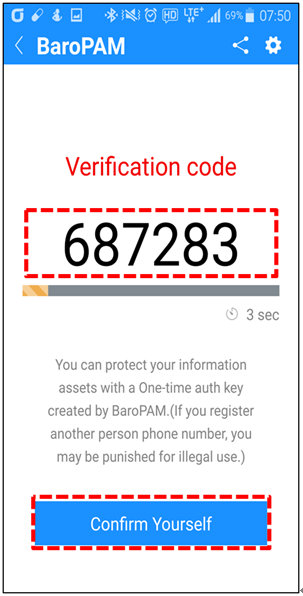
After checking the verification code, if you click the "Confirm Yourself" button, the verification code is verified by an internal algorithm and then the phone number is stored.
If the identity verification process is successful, it moves to the "Menu selection" screen, but if it fails, it moves to the "Identity verification" screen.
1.5 Using the BaroPAM app(Server information)
1. If the information on the information asset is not set (when using the "BaroPAM, BaroPAMs" app for the first time), the screen to register the information on the information asset appears as follows.
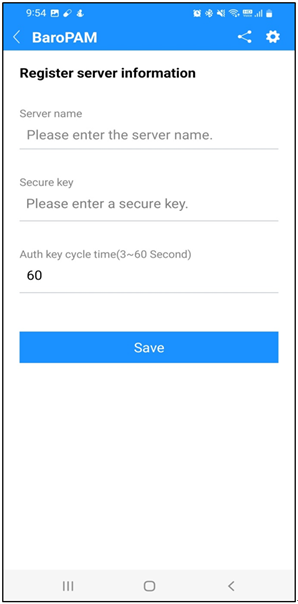
▣Server name
The server name on which BaroPAM will be operated is a required field and can be entered at least 1 digit or up to 30 digits.
▣Secure key
Secure key given by information asset or account is a required input item, and you must enter the one requested by the vendor.
If you enter a random "Secure key" that has not been granted by the vendor, an incorrect OTA key is given and you may not be able to log in to the information asset.
If the secure key set in the information asset and the secure key designated by the app are different, the OTA key is different and you may not be able to login.
▣Auth key cycle time(3~60 second)
Auth key cycle time is a mandatory input item and can be specified for a minimum of 3 seconds and a maximum of 60 seconds.
If the OTA key generation cycle (Auth key cycle time) set in the information asset and the OTA key generation cycle (Auth key cycle time) specified in the app are different, the OTA key is different. So there may be cases where you cannot log in.
2. After entering information about the information asset, click the "Save" button.
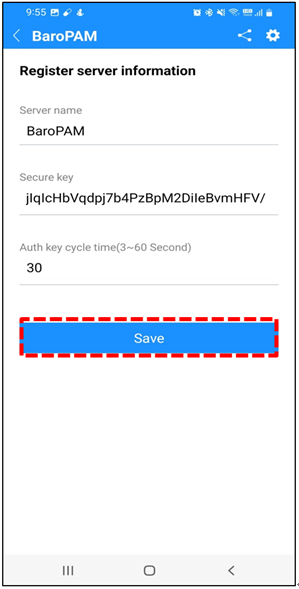
Clicking the "Save" button first checks the validity of the input items and then proceeds to save the information on the information asset.
If the information asset name (Server name) is not entered, the message "Please enter the server name." appears on the screen.
If a secure key is not entered, the message "Please enter a secure key" appears on the screen.
If the auth key cycle time is not entered or is out of range, the message "Please enter or confirm the auth key cycle" appears on the screen.
3. If the information on the information asset is not successfully saved, the "Register server information" screen continues, and when completed normally, the "List of server information" screen appears as follows.
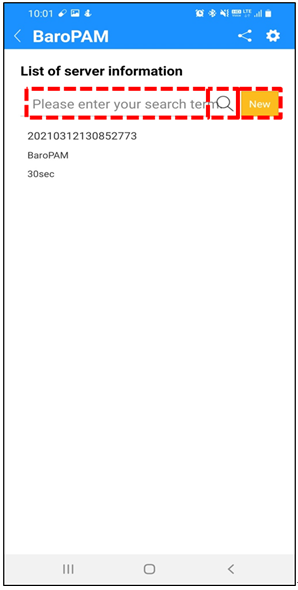
If you want to search for information on an information asset, enter a search term and click the "Search" button to display the information on the searched information asset on the screen.
If you need to add new information about information assets, click the "New" button and a screen to register information about information assets appears.
4. If you need to generate a secondary authentication key (OTA key), click the information item for the information asset in the server information list as follows.
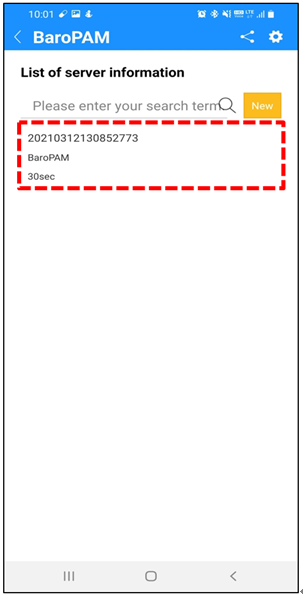
5. Then, a screen for creating a secondary authentication key (OTA key) based on the information on the information asset appears as follows.
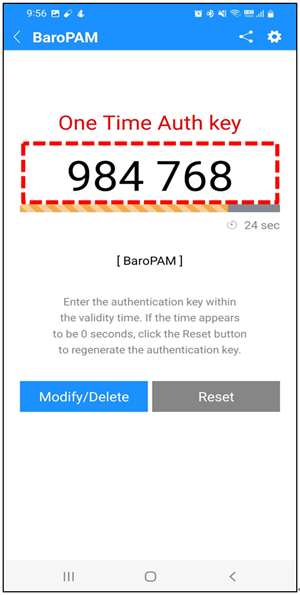
If you need to modify/delete information on information assets, click the "Modify/Delete" button.
During the same authentication key cycle time, the "Reset" button is deactivated, and when the authentication key cycle time passes, the "Reset" button is activated.
When the activated "Reset" button is clicked, a new secondary authentication key (OTA key) is generated, and the same secondary authentication key (OTA key) is generated during the one-time authentication key generation cycle (Auth key cycle time).
Note) If you click the number "984 768", which is the generated OTA key, the OTA key is regenerated in the same way as clicking the "Reset" button.
6. If you need to modify or delete information on an information asset, click the "Modify/Delete" button and the following screen will appear.
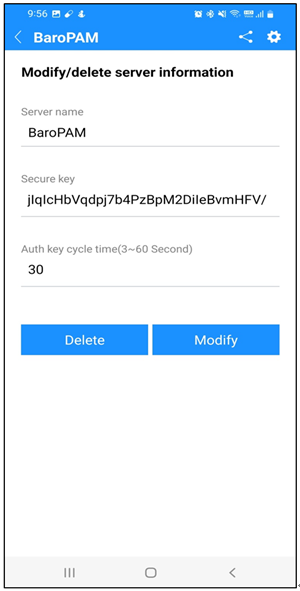
▣Server name
The server name on which BaroPAM will be operated is a required field and can be entered at least 1 digit or up to 30 digits.
▣Secure key
Secure key given by information asset or account is a required input item, and you must enter the one requested by the vendor.
If you enter a random "Secure key" that has not been granted by the vendor, an incorrect OTA key is given and you may not be able to log in to the information asset.
If the secure key set in the information asset and the secure key designated by the app are different, the OTA key is different and you may not be able to login.
▣Auth key cycle time(3~60 second)
Auth key cycle time is a mandatory input item and can be specified for a minimum of 3 seconds and a maximum of 60 seconds.
If the OTA key generation cycle (Auth key cycle time) set in the information asset and the OTA key generation cycle (Auth key cycle time) specified in the app are different, the OTA key is different. So there may be cases where you cannot log in.
Click the "Delete" button to delete the information on the information asset.
Clicking the "Modify" button first checks the validity of the input items and then proceeds to modify the information on the information asset.
If the information asset name (Server name) is not entered, the message "Please enter the server name." appears on the screen.
If a secure key is not entered, the message "Please enter a secure key." appears on the screen.
If the auth key cycle time is not entered or is out of range, the message "Please enter or confirm the auth key cycle." appears on the screen.
If the modification or deletion of information on the information asset is not completed normally, the "Modify/delete server information" screen continues, and when completed normally, the "List of server information" screen appears.
1.6 Using the BaroPAM app(Environment settings)
1. To configure the "BaroPAM" app, click the "Preferences" icon as follows.
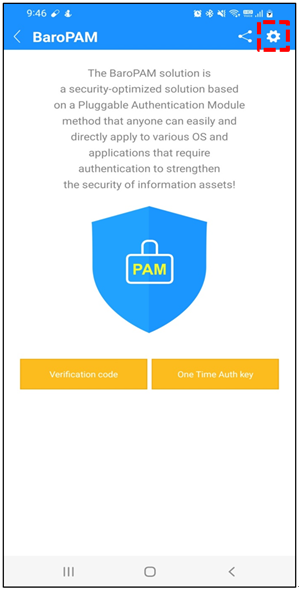
2. Then the "Preferences" screen appears as follows.
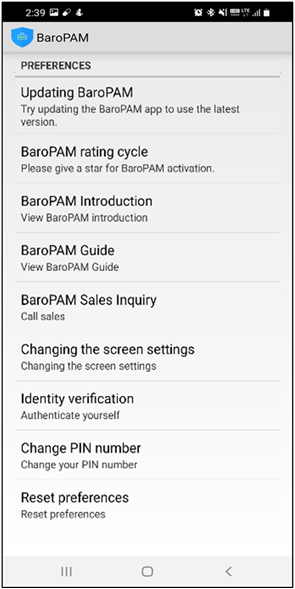
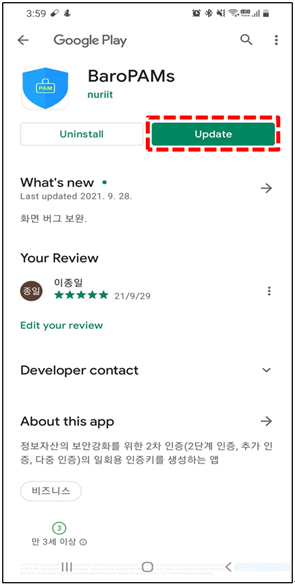
3. Click the "Update BaroPAM" item, and the following "Google Play Store" screen appears.
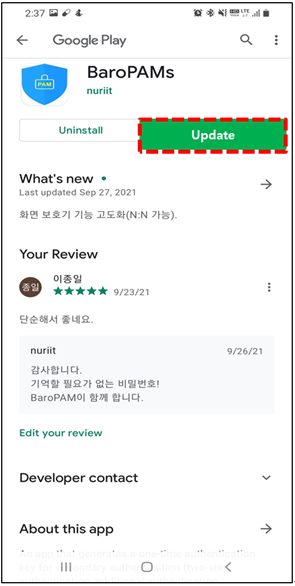
Click the "Update" button to update the "BaroPAM" app. If there is no "Update" button, it means that there is no information to update.
4. Click the "BaroPAM ratinge cycle" item and the "Google Play Store" rating cycle screen will appear.

To activate the "BaroPAM app, fill out and submit a star rating and comment to help activate the app.
5. Click the "BaroPAM Introduction" item and the following "BaroPAM Solution Introduction" screen will appear.
The "BaroPAM Solution Introduction" is provided in the form of a pdf file (baropam_intro_en.pdf).
6. Click the "BaroPAM Guide" item, and the following "BaroPAM App User Guide" screen appears.
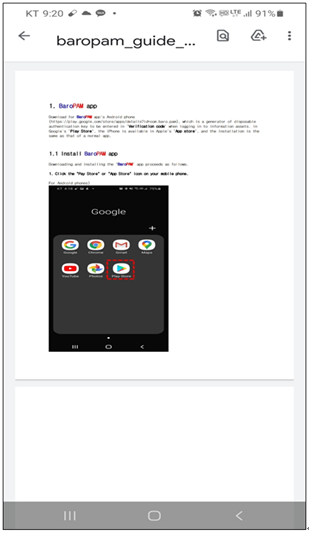
The "BaroPAM App User Guide" is provided in the form of a pdf file (baropam_guide_en.pdf).
7. Click the "BaroPAM Sales Inquiry" item and the following "Call" screen will appear.
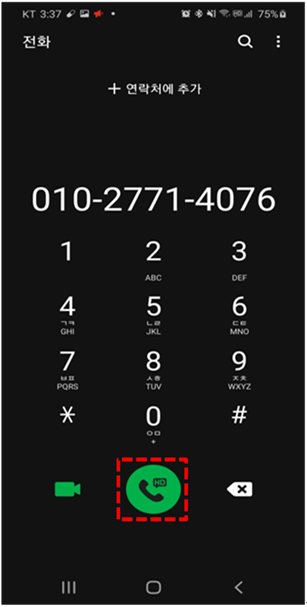
You can inquire about sales and general information about "BaroPAM" by clicking the "Call" button.
8. Click the "Change the screen settings" item and the following "Change the screen settings" screen appears.
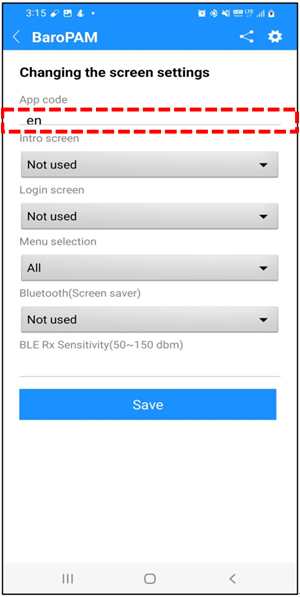
▣App code
Enter the app code given by the vendor. If not entered, the Korean mode "en" is designated by default, and the "BaroPAM" app is switched according to the entered app code.
예) App code
| Korean mode: kr English mode: en China mode: cn Japan mode: jp |
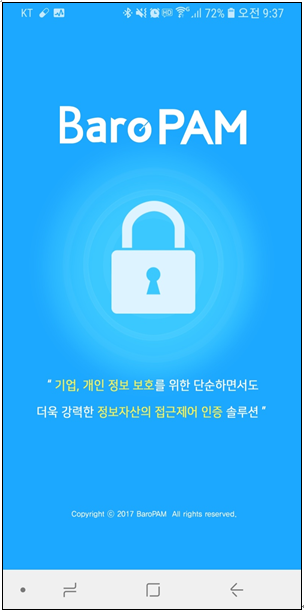
▣Intro screen
Select whether to use the intro screen. Select "Used" to use the intro screen or "not used" to not use the intro screen.
When using the intro screen When running the "BaroPAM" app, when the "BaroPAM" app is activated, the intro screen of "BaroPAM" is activated for 2 seconds and continues as follows.
▣Login screen
Select whether to use the login screen. If you do not use the login screen, select "Not used". When using a PIN number, select "PIN number is used". When using fingerprint or face recognition, select "Biometric auth is used".
When using biometric authentication such as fingerprint or face recognition as the login screen, register fingerprint and face recognition first in "Phone Settings -> Biometrics and security -> Fingerprints and Face Recognition".
When running the "BaroPAM" app, you can log in to the "BaroPAM" app through fingerprint or face recognition.
When using a PIN number as the login screen, the "Login" screen appears as follows.
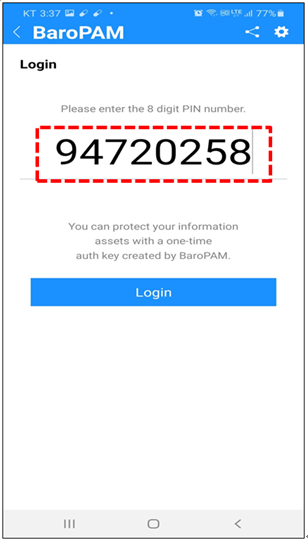
Clicking the "Login" button first checks the validity of the input items and then proceeds to check if the PIN number is correct.
If the PIN number is not 8 digits, the message "Please enter 8 digits of the PIN number" appears on the screen.
If it is different from the set PIN number, the message "The PIN number is wrong. Please check again and enter it." appears on the screen.
If the PIN number fails 5 times in a row, the message "Access denied." appears on the screen and the app is terminated after 3 seconds.
If the intro screen is used when running the "BaroPAM" app, the intro screen first lasts for 2 seconds and then moves to the login screen. If the login screen is used, the login screen proceeds normally and then the menu selection screen moves.
▣Menu selection
Select the menu to use. Using the screen for selecting "Menu", "All" when using both server and application login information, and when selecting, When using only server information, select "Authentication code", and when using only application login information, select "One-time auth key".
▣Bluetooth(Screen saver)
Windows and Open source OS (HamoniKR OS, Gooroom OS, TMaxOS) set a screen saver for information protection on the desktop PC. Select "Used" to use the screen saver lock/unlock function, and select "not used" to not use the screen saver lock/unlock function.
Clicking the "Save" button first checks the validity of the input items and then proceeds to save the screen setting information.
If the app code is entered and it is not two digits, a message "Please enter the app code." appears on the screen.
If the number of BLE connections is not entered or out of range, the message "Enter or check the number of BLE connections." appears on the screen.
If the saving operation is not completed normally, the "Change the screen settings" screen is continued, and when completed normally, the intro screen appears.
9. If you click the "Identity verification" item, the following "Identity verification" screen appears.

1) Enter your phone number as a number and click the "Next" button.
Clicking the "Next" button first checks the validity of the input items, and then delivers the verification code generated by the internal algorithm to the "Identity Verification" screen to proceed with the identity verification process.
If the phone number is less than 8 digits, the message "Please enter more than 8 digits of phone number." appears on the screen.
If you enter someone else's phone number, you may be punished for illegal use.
2) After checking the received verification code, click the "Confirm Yourself" button.
After checking the verification code, if you click the "Confirm Yourself" button, the verification code is verified by an internal algorithm and then the phone number is stored.
If the identity verification process is successful, it moves to the "Menu selection" screen, but if it fails, it moves to the "Identity verification" screen.
10. If you click the "Change PIN number" item, the following "Change PIN number or PIN number registration" screen appears when you select to use "Login screen" in "Changing the screen settings".
When a PIN number is not registered)
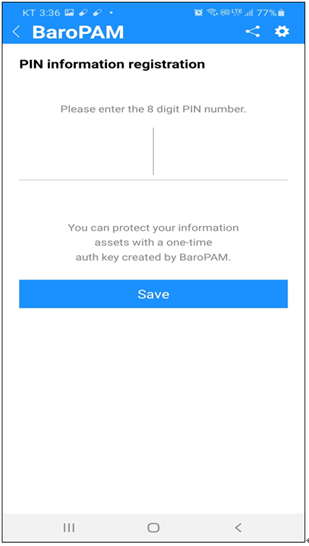
Clicking the "Save" button first checks the validity of the input items and then proceeds to save the PIN number.
If the PIN number is not 8 digits, the message "Please enter 8 digits of the PIN number." appears on the screen.
If the PIN number is not successfully saved, the "PIN number registration" screen continues. If the intro screen is normally used, the "Intro" screen appears, and if not, the "Menu selection" screen appears.
When a PIN number is registered)
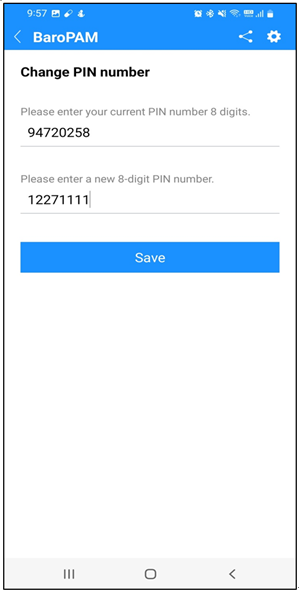
▣Enter your current PIN number 8 digits.
Enter the currently set PIN number.
▣Enter a new 8-digit PIN number.
Enter the new PIN number to be set.
Clicking the "Save" button first checks the validity of the input items and then proceeds to save the new PIN number.
If the PIN number is not 8 digits, the message "Please enter 8 digits of the PIN number." appears on the screen.
If the currently set PIN number is different from the newly entered PIN number, the message "The current PIN number is incorrect. Please check again and enter it." appears on the screen.
If the currently set PIN number and the new PIN number are the same, the message "The current PIN number and the new PIN number are the same. Please check again and enter." appears on the screen.
If the new PIN number is not 8 digits, the message "Please enter 8 digits for the new PIN number." appears on the screen.
If saving of the new PIN number is not completed normally, the "Change PIN number" screen continues. If the intro screen is used normally, the "Intro" screen appears, and if not, the "Menu selection" screen appears.
11. If you click the "Reset preferences" item, the following "Reset preferences" screen appears.
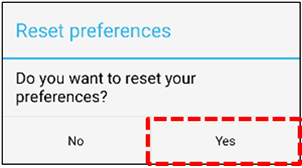
If you click the "Yes" button, the environment information set in the BaroPAM app will be initialized.
1.7 Using the BaroPAM app(Information sharings)
1. To share using SNS of the "BaroPAM" app, click the "Share BaroPAM" icon as follows.
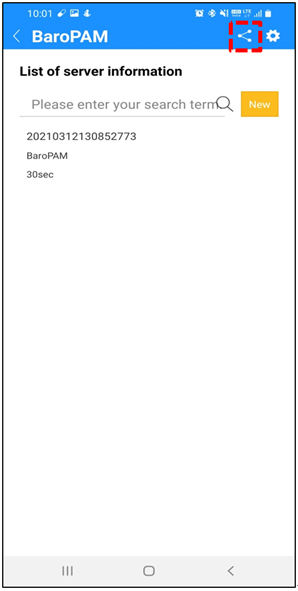
2. Then you will see a screen where you can "Share BaroPAM" as follows.
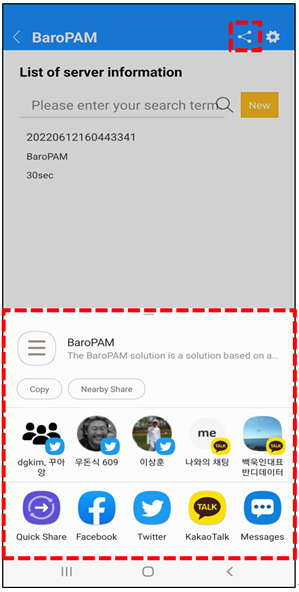
3. If you want to tweet on Twitter, click the "Tweet" icon and the following screen will appear.
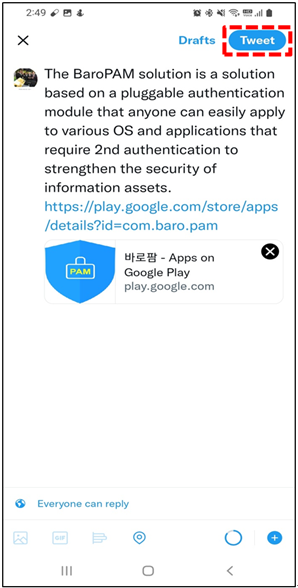
If you click the "tweet" icon, the tweeting process will proceed to the preset Twitter account.
1.8 BaroPAM App FAQ
Message: In case of iPhone Verification code (Message\n 123456) is not displayed on the keypad when verifying the identity after installing the "BaroPAM" app
Cause: The iPhone's "password auto-complete" function is not set.
Action: After installing the "BaroPAM" app, be sure to set up a more convenient password auto-completion function from iOS12.
(Go to iPhone's "Settings" -> "Passwords" -> "AutoFill Passwords" -> "Allow")
Message: If the date and time of the Android phone or iPhone is different from the current time and the "one-time authentication key" is not correct
Cause: It occurs because the date and time of the Android phone or iPhone are not using the time provided by the network.
Action: For Android phone, "Settings" -> "General management" -> "Date & Time" -> "Date & Auto Set" and
"Time Zone Auto Set" -> "Allow"
For iPhone, "Settings" -> "Date & Time" -> "Automatically set" -> "Allow" of the phone.
Message: When a message is sent to a specific type of phone number, it can be sent but not received
If you can't send a message from your iPhone to your phone number
Cause: IPhone Settings Problems Related to Messages
Action: Solved after rebooting iPhone
First of all, please check the following to check if messages cannot be sent to your iPhone.
1. Settings-in the message
-Check if iMessage is active
-If iMessage is activated, check if your phone number is registered in sending and receiving
-Check if Send by SMS is enabled
-Confirm MMS message activation in SMS/MMS field
-Check if your phone number is registered in the blocked contacts in the SMS/MMS column, and if it is, remove it.
-Enabling notification in the mansion column
2. Try sending a new message to your iPhone number directly from the iPhone's Messages app.
-If the transmission does not work at all
-If transmission is possible but not reception
If not in the above case
If someone sends a message to your phone number and receives it normally, check the following URL for each case.
>> If you can't send or receive messages on your iPhone, iPad, or iPod touch
https://support.apple.com/en-us/HT204065
>> 'Why is my iPhone not sending messages?': How to troubleshoot iPhone messaging issues
https://www.businessinsider.com/why-is-my-iphone-not-sending-messages
>> Setting up text message forwarding
https://support.apple.com/ko-kr/HT208386
1.9 BaroPAM Integration API
1. Application login
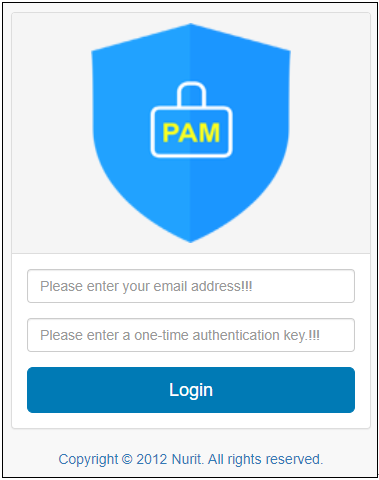
1.1 BaroPAM login screen example)
1.2 Authentication key verification part
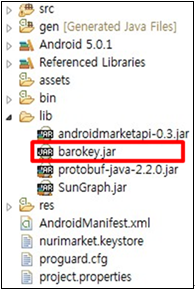
The API for verifying the one-time authentication key entered in the password field when logging into the application is provided as "barokey.jar". You can set the lib directory "barokey.jar" of the WAS (Web application Server) or include the directory where "barokey.jar" exists in the classpath.
| [root] /home/tomcat/webapps/ROOT/WEB-INF/lib > ls -al 합계 4908 drwxr-xr-x 2 root root 4096 5월 8 11:25 . drwxr-xr-x 5 root root 4096 5월 9 15:12 .. -rw------- 1 root root 116 3월 13 2015 .bash_history -rw-r--r-- 1 root root 26074 6월 20 20:49 barokey.jar -rw-r--r-- 1 root root 57779 5월 24 2011 commons-fileupload-1.2.1.jar -rw-r--r-- 1 root root 109043 5월 24 2011 commons-io-1.4.jar -rw-r--r-- 1 root root 60841 5월 24 2011 commons-logging-1.1.1.jar -rw-r--r-- 1 root root 26520 5월 24 2011 commons-logging-adapters-1.1.1.jar -rw-r--r-- 1 root root 56404 5월 24 2011 cos.jar -rw-r--r-- 1 root root 313898 5월 24 2011 dom4j-1.6.1-goldkeby.jar -rw-r--r-- 1 root root 19679 6월 4 2014 gcm-server.jar -rw-r--r-- 1 root root 341207 10월 6 2008 j2ssh-common-0.2.9.jar -rw-r--r-- 1 root root 355141 10월 6 2008 j2ssh-core-0.2.9.jar -rw-r--r-- 1 root root 110582 10월 6 2008 j2ssh-dameon-0.2.9.jar -rw-r--r-- 1 root root 456805 5월 6 2016 j2ssh-maverick-1.5.5.jar -rw-r--r-- 1 root root 258160 10월 27 2011 jai_codec.jar -rw-r--r-- 1 root root 1900631 10월 27 2011 jai_core.jar -rw-r--r-- 1 root root 464938 3월 6 2012 jimiproclasses-sabisung.jar -rw-r--r-- 1 root root 23737 6월 4 2014 json-simple-1.1.1.jar -rw-r--r-- 1 root root 30202 5월 24 2011 json.jar -rw-r--r-- 1 root root 312603 1월 25 2012 twitter4j-core-2.2.5.jar |
The following code can be inserted into the program that verifies the one-time authentication key, which is the password entered when logging in to the application.
1.3 For Android
1) Authentication key generator part
The API for generating a one-time authentication key to be entered in the password field when logging in to the application is provided as "barokey.jar". When using Eclipse, "barokey.jar" must be located in the libs directory.
You can insert the following code in the program that generates a one-time authentication key, which is a password to be entered when logging into the application.
| ... import com.barokey.barokey; ... String tkey = barokey.generateKEYL(String login_id, String phone_no, String cycle_time); ... |
| Parameter | Remark | Etc |
| login_id | Set the ID entered in the Login ID field on the login screen. | |
| phone_no | Set the smartphone number obtained from inside the app using the TelephonyManager method. | |
| cycle_time | Set the generation cycle (3~60 seconds) of individual one-time authentication key. If the generation cycle of the one-time authentication key designated for each individual is different, the one-time authentication key may be generated differently. |
Screen example)
Screen Layout example)
| <?xml version="1.0" encoding="utf-8"?> xmlns:app="http://schemas.android.com/apk/res-auto" android:layout_width="fill_parent" android:layout_height="fill_parent" android:background="@color/bg_body_default" android:orientation="vertical"> <include android:id="@+id/inc_header" layout="@layout/inc_header" android:layout_width="fill_parent" android:layout_height="@dimen/head_height" /> <ScrollView android:layout_width="match_parent" android:layout_height="match_parent" android:layout_marginLeft="@dimen/body_margin_right_default" android:layout_marginRight="@dimen/body_margin_right_default" android:layout_marginTop="@dimen/head_height"> android:id="@+id/body_frame" android:layout_width="fill_parent" android:layout_height="fill_parent"> <TextView android:layout_width="wrap_content" android:layout_height="wrap_content" android:layout_gravity="center_horizontal" android:layout_marginTop="81dip" android:padding="10dp" android:text="@string/tv_key_vc" android:textColor="@color/text_body_default" android:textSize="20dip" /> <TextView android:id="@+id/tv_auth_key" android:layout_width="fill_parent" android:layout_height="wrap_content" android:layout_gravity="center_horizontal" android:layout_marginTop="150dip" android:background="@android:color/transparent" android:ems="10" android:gravity="center" android:imeOptions="actionGo" android:inputType="text" android:maxLength="8" android:nextFocusDown="@+id/btn_login" android:singleLine="true" android:text="" android:textAppearance="?android:attr/textAppearanceLarge" android:textColor="@color/text_body_default" android:textSize="65dip" /> <TextView android:layout_width="fill_parent" android:layout_height="1dip" android:layout_gravity="center_horizontal" android:layout_marginLeft="50dip" android:layout_marginRight="50dip" android:layout_marginTop="230dip" android:background="@color/line_text_under" android:visibility="invisible" /> <com.beardedhen.androidbootstrap.BootstrapProgressBar android:id="@+id/progressBar" android:layout_width="fill_parent" android:layout_height="12dip" android:layout_gravity="center_horizontal" android:layout_marginTop="240dip" app:animated="true" app:bootstrapBrand="warning" app:bootstrapProgress="100" app:striped="true" /> <LinearLayout android:layout_width="fill_parent" android:layout_height="wrap_content" android:layout_marginTop="260dip" android:orientation="horizontal"> <TextView android:layout_width="fill_parent" android:layout_height="wrap_content" android:layout_weight="1" /> <ImageView android:layout_width="15dip" android:layout_height="15dip" android:layout_gravity="center_vertical|right" android:background="@drawable/ico_countdown" /> <TextView android:id="@+id/tv_remainTime" android:layout_width="wrap_content" android:layout_height="wrap_content" android:gravity="right|center_vertical" android:paddingLeft="10dip" android:textColor="@color/text_body_guide" android:textSize="17dip" /> </LinearLayout> <TextView android:id="@+id/tv_system_nm" android:layout_width="wrap_content" android:layout_height="wrap_content" android:layout_gravity="center_horizontal" android:layout_marginTop="315dip" android:text="" android:textColor="@color/text_body_default" android:textSize="18dip" /> <TextView android:layout_width="wrap_content" android:layout_height="wrap_content" android:layout_gravity="center_horizontal" android:layout_marginTop="380dip" android:text="@string/tv_key_msg_1" android:textColor="@color/text_body_guide" android:textSize="18dip" /> <TextView android:layout_width="wrap_content" android:layout_height="wrap_content" android:layout_gravity="center_horizontal" android:layout_marginTop="405dip" android:text="@string/tv_key_msg_2" android:textColor="@color/text_body_guide" android:textSize="18dip" /> <TextView android:layout_width="wrap_content" android:layout_height="wrap_content" android:layout_gravity="center_horizontal" android:layout_marginTop="430dip" android:text="@string/tv_key_msg_3" android:textColor="@color/text_body_guide" android:textSize="18dip" /> <LinearLayout android:layout_width="fill_parent" android:layout_height="wrap_content" android:layout_marginTop="490dip" android:orientation="horizontal"> <Button android:id="@+id/btn_update" android:layout_width="fill_parent" android:layout_height="@dimen/btn_height_default" android:layout_weight="1" android:background="@drawable/btn_default_drawable" android:text="@string/btn_upd_del" android:textColor="@color/white" android:textSize="20dip" /> <TextView android:layout_width="6dip" android:layout_height="1dip" android:layout_gravity="center_horizontal" android:background="@android:color/transparent" /> <Button android:id="@+id/btn_reset" android:layout_width="fill_parent" android:layout_height="@dimen/btn_height_default" android:layout_weight="1" android:background="@drawable/btn_default_drawable" android:enabled="false" android:text="@string/btn_reset" android:textColor="@color/white" android:textSize="20dip" /> </LinearLayout> </FrameLayout> </ScrollView> </FrameLayout> |
Program example)
| package com.baro.otp.info; import android.Manifest; import android.annotation.SuppressLint; import android.content.Context; import android.content.Intent; import android.content.pm.PackageManager; import android.os.Build; import android.os.Bundle; import android.os.Handler; import android.os.Message; import android.os.Vibrator; import android.support.v4.app.ActivityCompat; import android.telephony.TelephonyManager; import android.view.View; import android.view.View.OnClickListener; import android.view.inputmethod.InputMethodManager; import android.widget.Button; import android.widget.TextView; import com.baro.common.base.BaseActivity; import com.baro.common.base.BaseInterface; import com.baro.common.setting.SettingACT; import com.baro.common.util.Util; import com.baro.pam.R; import com.barokey.barokey; import com.beardedhen.androidbootstrap.BootstrapProgressBar; import java.util.Date; public class OTPCreateACT extends BaseActivity implements BaseInterface, OnClickListener { //public class OTPCreateACT extends AppCompatActivity implements BaseInterface, OnClickListener { private Button btn_setting, btn_share, btn_close, btn_reset, btn_update; private TextView tv_auth_key; private TextView tv_remainTime; private BootstrapProgressBar progressBar; private TextView tv_system_nm; private String intent_reg_dt = "", intent_system_nm = "", intent_login_id = "", intent_cycle_time = ""; private String PhoneNumber = "", SerialNumber = "", AndroID = "", MacAddr = ""; private long createdMillis, remainingSec; private static final int MESSAGE_REFRESH_REMAINING_SECOND = 101; private static final int SENDMESSAGE_INTERVAL = 250; private String[] permission_list = { Manifest.permission.INTERNET, Manifest.permission.ACCESS_WIFI_STATE, Manifest.permission.ACCESS_NETWORK_STATE, Manifest.permission.READ_EXTERNAL_STORAGE, Manifest.permission.WRITE_EXTERNAL_STORAGE, Manifest.permission.READ_PHONE_STATE, Manifest.permission.CALL_PHONE }; @Override public void onCreate(Bundle savedInstanceState) { try { super.onCreate(savedInstanceState); setContentView(R.layout.act_otpcreate); checkPermission(); drawView(); getIntentData(); } catch (Exception e) { e.printStackTrace(); } finally { } } @Override public void onPause() { super.onPause(); if (null != m_handlerProc) { m_handlerProc.removeMessages(MESSAGE_REFRESH_REMAINING_SECOND); } } @Override public void onResume() { super.onResume(); if (null != m_handlerProc) { m_handlerProc.sendEmptyMessageDelayed(MESSAGE_REFRESH_REMAINING_SECOND, SENDMESSAGE_INTERVAL); } } @SuppressLint("HardwareIds") @Override public void drawView() { try { vibe = (Vibrator) getSystemService(Context.VIBRATOR_SERVICE); findViewById(R.id.body_frame).setOnClickListener(new OnClickListener() { public void onClick(View v) { InputMethodManager imm = (InputMethodManager) getSystemService(Context.INPUT_METHOD_SERVICE); imm.hideSoftInputFromWindow(v.getWindowToken(), 0); } }); tv_system_nm = (TextView) findViewById(R.id.tv_system_nm); tv_system_nm.setOnClickListener(this); tv_auth_key = (TextView) findViewById(R.id.tv_auth_key); tv_auth_key.setFocusable(true); tv_auth_key.setClickable(false); progressBar = (BootstrapProgressBar) findViewById(R.id.progressBar); tv_remainTime = (TextView) findViewById(R.id.tv_remainTime); btn_setting = (Button) findViewById(R.id.btn_setting); btn_setting.setOnClickListener(this); btn_share = (Button) findViewById(R.id.btn_share); btn_share.setOnClickListener(this); ((Button) findViewById(R.id.btn_go_back)).setOnClickListener(this); btn_close = (Button) findViewById(R.id.btn_close); btn_close.setOnClickListener(this); btn_update = (Button) findViewById(R.id.btn_update); btn_update.setOnClickListener(this); btn_reset = (Button) findViewById(R.id.btn_reset); btn_reset.setOnClickListener(this); TelephonyManager systemService = (TelephonyManager) getSystemService(Context.TELEPHONY_SERVICE); assert systemService != null; PhoneNumber = systemService.getLine1Number(); PhoneNumber = PhoneNumber.substring(PhoneNumber.length() - 10, PhoneNumber.length()); PhoneNumber = "0" + PhoneNumber; } catch (SecurityException e) { e.printStackTrace(); } catch (Exception e) { e.printStackTrace(); } finally { } } public void getIntentData() { try { Intent intent = getIntent(); getDefaultIntent(intent); if (intent.getStringExtra("reg_dt") != null) { intent_reg_dt = intent.getStringExtra("reg_dt").trim(); } if (intent.getStringExtra("system_nm") != null) { intent_system_nm = intent.getStringExtra("system_nm"); } if (intent.getStringExtra("login_id") != null) { intent_login_id = intent.getStringExtra("login_id").trim(); } if (intent.getStringExtra("cycle_time") != null) { intent_cycle_time = intent.getStringExtra("cycle_time").trim(); } if ("".equals(intent_system_nm.trim())) { tv_system_nm.setText("[ " + intent_login_id + " ]"); } else if (!"".equals(intent_system_nm) && (!"".equals(intent_login_id))) { tv_system_nm.setText("[ " + intent_system_nm + " / " + intent_login_id + " ]"); } if (!"".equals(intent_login_id) && !"".equals(PhoneNumber) && (!"".equals(intent_cycle_time))) { onAuthKey(); } else { finish(); } } catch (Exception e) { e.printStackTrace(); } finally { } } @Override public void onClick(View v) { try { switch (v.getId()) { case R.id.btn_setting: // Setting Intent intent = new Intent(this, SettingACT.class); intent.setFlags(Intent.FLAG_ACTIVITY_CLEAR_WHEN_TASK_RESET); startActivity(intent); //finish(); break; case R.id.btn_share: intent = new Intent(Intent.ACTION_SEND); intent.addCategory(Intent.CATEGORY_DEFAULT); intent.putExtra(Intent.EXTRA_TEXT , getString(R.string.app_share)); intent.putExtra(Intent.EXTRA_TITLE, getString(R.string.app_name )); intent.setType("text/plain"); startActivity(Intent.createChooser(intent, getString(R.string.share_text))); //finish(); break; case R.id.btn_go_back: // go back finish(); break; case R.id.btn_close: // Close moveTaskToBack(true); finish(); android.os.Process.killProcess(android.os.Process.myPid()); break; case R.id.btn_update: // Update intent = new Intent(OTPCreateACT.this, OTPUpdateACT.class); intent.putExtra("reg_dt" , intent_reg_dt ); intent.putExtra("system_nm" , intent_system_nm ); intent.putExtra("login_id" , intent_login_id ); intent.putExtra("cycle_time", intent_cycle_time); startActivity(intent); finish(); break; case R.id.btn_reset: // Reset if (!"".equals(intent_login_id) && !"".equals(PhoneNumber) && (!"".equals(intent_cycle_time))) { onAuthKey(); } else { finish(); } break; } } catch (Exception e) { e.printStackTrace(); } finally { } } public void onAuthKey() { try { tv_auth_key.setText(""); createdMillis = estimateCreatedMillis(intent_cycle_time); tv_auth_key.setText(barokey.generateKEYL(intent_login_id, PhoneNumber, intent_cycle_time)); m_handlerProc.sendEmptyMessageDelayed(MESSAGE_REFRESH_REMAINING_SECOND, SENDMESSAGE_INTERVAL); } catch (Exception e) { e.printStackTrace(); } finally { } } private final Handler m_handlerProc = new Handler() { @Override public void handleMessage(Message message) { switch (message.what) { case MESSAGE_REFRESH_REMAINING_SECOND: try { long cycleMillis = (Long.parseLong(intent_cycle_time) * 1000L); long remainingMillis = estimateRemainingMillis(intent_cycle_time, createdMillis); long remainingSecond = remainingMillis != 0 ? (remainingMillis / 1000L) : 0; if (0 < remainingMillis) { m_handlerProc.sendEmptyMessageDelayed(MESSAGE_REFRESH_REMAINING_SECOND, SENDMESSAGE_INTERVAL); btn_reset.setEnabled(false); } else { m_handlerProc.removeMessages(MESSAGE_REFRESH_REMAINING_SECOND); btn_reset.setEnabled(true); } tv_remainTime.setText(remainingSecond + " " + getString(R.string.remain_time_suffix)); if (0 != cycleMillis) { progressBar.setProgress((int) (((float) remainingMillis / (float) cycleMillis) * 100.0F)); } } catch (Exception e) { e.printStackTrace(); } finally { } break; } } }; public long estimateCreatedMillis(String cycleSecondString) { long remainingMillis = (barokey.getRemainingTime(cycleSecondString) * 1000L) - 200; long cycleMillis = (Long.parseLong(cycleSecondString) * 1000L); long currentMillis = (new Date()).getTime(); long elapsedMillis = cycleMillis - remainingMillis; long createdMillis = currentMillis - elapsedMillis; return createdMillis; } public long estimateRemainingMillis(String cycleSecondString, long createdTime) { long cycleMillis = (Long.parseLong(cycleSecondString) * 1000L); long currentMillis = (new Date()).getTime(); long elapsedMillis = currentMillis - createdTime; long remainingMillis = barokey.getRemainingTime(cycleSecondString) * 1000L; remainingMillis = cycleMillis > elapsedMillis ? remainingMillis : 0; remainingMillis = remainingMillis >= cycleMillis ? 0 : remainingMillis; return remainingMillis; } public void checkPermission() { if (Build.VERSION.SDK_INT < Build.VERSION_CODES.M) return; for(String permission : permission_list) { int permssionCheck = checkCallingOrSelfPermission(permission); if (permssionCheck == PackageManager.PERMISSION_DENIED) { ActivityCompat.requestPermissions(this, permission_list, 0); } } } public void onRequestPermissionsResult(int requestCode, String[] permissions, int[] grantResults) { if (requestCode == 0) { for(int ii = 0; ii < grantResults.length; ii++) { if (grantResults[ii] != PackageManager.PERMISSION_GRANTED) { Util.MsgToast(OTPCreateACT.this, getString(R.string.msg_security_set), 0); finish(); } } } } } |
1.4 For iPhone
1) Authentication key generator part
The API for generating a one-time authentication key to be entered in the password field when logging in to the application is provided as "libbaroutil.a", and this file is a library file for the NSObject Interface including barokey, barocrypt, and base64 related libraries.
There are two types of library files. XCode's iPhone simulator and iPhone are both changed to libbaroutil.a if necessary.
- libbaroutil.a.iphone : for iPhone
- libbaroutil.a.simul : for iPhone simulator
This file is registered and used when setting the project of XCode as below.

The APIs related to BaroPAM are as follows. Since the function is composed of the C function interface, the input data type is expressed in the C function style. The source of the usage example is code written in iOS swift 5.0 or later.
generateKEYL function
This function creates a one-time authentication key used for login/authentication to the application.
| Input variable | const char *login_id | The ID entered in the Login ID field of the login screen must be set. |
| const char *phone_no | User smartphone number. Unlike in the app for Android, the smartphone number of the user to be used in the authentication module of the server is directly registered and managed in the app without obtaining the user's smartphone number in iOS, and the registered smartphone number is selected and used. | |
| const char *cycle_time | It must be consistent with the generation cycle (3~60 seconds) of individual one-time authentication key. If the generation cycle of the one-time authentication key designated for each individual is different, the one-time authentication key may be generated differently. |
|
| const char *key_method | "app512" is set as a method of generating a disposable authentication key (app1, app256, app384, app512: app). | |
| Return value | auth key | Returns the generated one-time authentication key. |
Example of use in swift 5.0 or higher)
| private func makeOtpInfo() { let loginid = _otp?.LOGIN_ID ?? "mc529@hanmail.net" let tel = _otp?.PHONE_NO ?? "01027714076" let time = (_otp?.CYCLE_TIME ?? "30")! let otpnum = generateKEYL(loginid, tel, time, "app512") _otpInfo.text = "[ \(_otp?.SYSTEM_NM ?? "")/\(_otp?.LOGIN_ID ?? "") ]" let otpnumStr = String(cString: otpnum!) let start = otpnumStr.index(otpnumStr.startIndex, offsetBy: 0) let end = otpnumStr.index(otpnumStr.startIndex, offsetBy: 3) let start2 = otpnumStr.index(otpnumStr.startIndex, offsetBy: 3) let end2 = otpnumStr.index(otpnumStr.startIndex, offsetBy: 6) _tfOTP.text = otpnumStr[start..<end] + " " + otpnumStr[start2..<end2] var step = 0 self._progress.progress = 0 self._btnReset.isEnabled = false self._btnReset.backgroundColor = uicolorFromHex(rgbValue: 0xA0AAB4) let remain = getRemainingTime(_otp?.CYCLE_TIME ?? "30") let cycle_time = Int(self._otp!.CYCLE_TIME) _timer = Timer.scheduledTimer(withTimeInterval: 1.0, repeats: true, block: { _timer in let change: Float = Float(Double(remain - step - 1) / Double(cycle_time!)) print("---- \(remain),\(change),\(step)") self._progress.progress = change step += 1 self._remainTime.text = String(remain - step) + " " + "TIME".localized if step == remain { self._timer?.invalidate() self._btnReset.isEnabled = true self._btnReset.backgroundColor = uicolorFromHex(rgbValue: 0x1B90FF) } }) } |
Screen example)
Screen Layout example)
Storyboard를 의미한다. Means Storyboard. Refer to developer.apple.com for the meaning of each parameter.
| <!--Create View Controller--> <scene sceneID="xJv-bd-Ejb"> <objects> <viewController storyboardIdentifier="CreateOTP" id="BPh-Tl-Gd5" customClass="OTPCreateViewController" customModule="BaroPAM" customModuleProvider="target" sceneMemberID="viewController"> <layoutGuides> <viewControllerLayoutGuide type="top" id="TF9-Et-51n"/> <viewControllerLayoutGuide type="bottom" id="rXs-zr-mnc"/> </layoutGuides> <view key="view" contentMode="scaleToFill" id="DbI-ks-whW"> <rect key="frame" x="0.0" y="0.0" width="375" height="812"/> <autoresizingMask key="autoresizingMask" widthSizable="YES" heightSizable="YES"/> <subviews> <textView clipsSubviews="YES" multipleTouchEnabled="YES" contentMode="scaleToFill" fixedFrame="YES" text="일회용 인증키" textAlignment="center" translatesAutoresizingMaskIntoConstraints="NO" id="O0T-Oa-9fL"> <rect key="frame" x="0.0" y="125" width="375" height="40"/> <autoresizingMask key="autoresizingMask" widthSizable="YES" flexibleMaxY="YES"/> <color key="textColor" white="0.0" alpha="1" colorSpace="calibratedWhite"/> <fontDescription key="fontDescription" name="SpoqaHanSans-Regular" family="SpoqaHanSans" pointSize="17"/> <textInputTraits key="textInputTraits" autocapitalizationType="sentences"/> </textView> <textField opaque="NO" clipsSubviews="YES" contentMode="scaleToFill" fixedFrame="YES" contentHorizontalAlignment="left" contentVerticalAlignment="center" text="12345678" textAlignment="center" minimumFontSize="17" translatesAutoresizingMaskIntoConstraints="NO" id="y9V-iO-Xec"> <rect key="frame" x="19" y="204" width="336" height="52"/> <autoresizingMask key="autoresizingMask" widthSizable="YES" flexibleMaxY="YES"/> <color key="backgroundColor" white="1" alpha="1" colorSpace="calibratedWhite"/> <fontDescription key="fontDescription" name="SpoqaHanSans-Regular" family="SpoqaHanSans" pointSize="50"/> <textInputTraits key="textInputTraits"/> </textField> <button opaque="NO" contentMode="scaleToFill" fixedFrame="YES" contentHorizontalAlignment="center" contentVerticalAlignment="center" buttonType="roundedRect" lineBreakMode="middleTruncation" translatesAutoresizingMaskIntoConstraints="NO" id="wn5-JQ-qp2"> <rect key="frame" x="23" y="683" width="160" height="43"/> <autoresizingMask key="autoresizingMask" widthSizable="YES" flexibleMaxX="YES" flexibleMinY="YES"/> <fontDescription key="fontDescription" name="SpoqaHanSans-Regular" family="SpoqaHanSans" pointSize="17"/> <state key="normal" title="Update/Delete"> <color key="titleColor" white="1" alpha="1" colorSpace="calibratedWhite"/> </state> <connections> <action selector="onEdit:" destination="BPh-Tl-Gd5" eventType="touchUpInside" id="Lq0-gt-fdh"/> <action selector="onOk:" destination="BYZ-38-t0r" eventType="touchUpInside" id="ya1-b8-A5Q"/> </connections> </button> <button opaque="NO" contentMode="scaleToFill" fixedFrame="YES" contentHorizontalAlignment="center" contentVerticalAlignment="center" buttonType="roundedRect" lineBreakMode="middleTruncation" translatesAutoresizingMaskIntoConstraints="NO" id="phw-d7-Zsz"> <rect key="frame" x="199" y="683" width="160" height="43"/> <autoresizingMask key="autoresizingMask" flexibleMinX="YES" widthSizable="YES" flexibleMinY="YES"/> <fontDescription key="fontDescription" name="SpoqaHanSans-Regular" family="SpoqaHanSans" pointSize="17"/> <state key="normal" title="Reset"> <color key="titleColor" white="1" alpha="1" colorSpace="calibratedWhite"/> </state> <connections> <action selector="onReset:" destination="BPh-Tl-Gd5" eventType="touchUpInside" id="2is-dP-y2P"/> </connections> </button> <view contentMode="scaleToFill" fixedFrame="YES" translatesAutoresizingMaskIntoConstraints="NO" id="KTy-6U-0mm"> <rect key="frame" x="0.0" y="0.0" width="375" height="70"/> <autoresizingMask key="autoresizingMask" widthSizable="YES" flexibleMaxY="YES"/> <subviews> <button opaque="NO" contentMode="scaleToFill" fixedFrame="YES" contentHorizontalAlignment="center" contentVerticalAlignment="center" lineBreakMode="middleTruncation" translatesAutoresizingMaskIntoConstraints="NO" id="5ZR-gQ-4P5"> <rect key="frame" x="283" y="34" width="31" height="31"/> <autoresizingMask key="autoresizingMask" flexibleMinX="YES" flexibleMaxY="YES"/> <inset key="imageEdgeInsets" minX="3" minY="3" maxX="3" maxY="3"/> <state key="normal" image="btn_share.png"/> <connections> <action selector="onShare:" destination="BPh-Tl-Gd5" eventType="touchUpInside" id="rVd-lW-j3A"/> </connections> </button> <button opaque="NO" contentMode="scaleToFill" fixedFrame="YES" contentHorizontalAlignment="center" contentVerticalAlignment="center" lineBreakMode="middleTruncation" translatesAutoresizingMaskIntoConstraints="NO" id="uD6-U2-2w3"> <rect key="frame" x="322" y="34" width="33" height="32"/> <autoresizingMask key="autoresizingMask" flexibleMinX="YES" flexibleMaxY="YES"/> <inset key="imageEdgeInsets" minX="3" minY="3" maxX="3" maxY="3"/> <state key="normal" image="btn_setting.png"/> <connections> <action selector="onSetting:" destination="BPh-Tl-Gd5" eventType="touchUpInside" id="Qhc-bj-CHe"/> </connections> </button> <imageView userInteractionEnabled="NO" contentMode="scaleAspectFit" horizontalHuggingPriority="251" verticalHuggingPriority="251" fixedFrame="YES" image="btn_prev.png" translatesAutoresizingMaskIntoConstraints="NO" id="cZQ-Jb-Iuv"> <rect key="frame" x="19" y="35" width="31" height="31"/> <autoresizingMask key="autoresizingMask" flexibleMaxX="YES" heightSizable="YES"/> </imageView> <imageView userInteractionEnabled="NO" contentMode="scaleAspectFit" horizontalHuggingPriority="251" verticalHuggingPriority="251" fixedFrame="YES" image="logo_barootp.png" translatesAutoresizingMaskIntoConstraints="NO" id="vWu-o6-6az"> <rect key="frame" x="115" y="38" width="145" height="25"/> <autoresizingMask key="autoresizingMask" flexibleMaxX="YES" flexibleMaxY="YES"/> </imageView> </subviews> <color key="backgroundColor" red="0.10588235294117647" green="0.56470588235294117" blue="1" alpha="1" colorSpace="calibratedRGB"/> </view> <textView clipsSubviews="YES" multipleTouchEnabled="YES" contentMode="scaleToFill" fixedFrame="YES" editable="NO" text="유효시간 내에 인증키를 입력하세요. 시간을 초과한 경우 Reset 버튼을 클릭하여 인증키를 재생성 하세요." textAlignment="natural" selectable="NO" translatesAutoresizingMaskIntoConstraints="NO" id="s4z-fe-3rj"> <rect key="frame" x="49" y="585" width="276" height="112"/> <autoresizingMask key="autoresizingMask" widthSizable="YES" flexibleMinY="YES"/> <color key="textColor" red="0.33333333333333331" green="0.33333333333333331" blue="0.33333333333333331" alpha="1" colorSpace="calibratedRGB"/> <fontDescription key="fontDescription" name="SpoqaHanSans-Regular" family="SpoqaHanSans" pointSize="17"/> <textInputTraits key="textInputTraits" autocapitalizationType="sentences"/> </textView> <progressView opaque="NO" contentMode="scaleToFill" verticalHuggingPriority="750" fixedFrame="YES" progress="0.5" translatesAutoresizingMaskIntoConstraints="NO" id="eFk-qb-ugh"> <rect key="frame" x="52" y="274" width="270" height="2"/> <autoresizingMask key="autoresizingMask" widthSizable="YES"/> </progressView> <imageView userInteractionEnabled="NO" contentMode="scaleToFill" horizontalHuggingPriority="251" verticalHuggingPriority="251" fixedFrame="YES" image="ico_countdown.png" translatesAutoresizingMaskIntoConstraints="NO" id="UC7-dN-2I6"> <rect key="frame" x="250" y="284" width="15" height="15"/> <autoresizingMask key="autoresizingMask" flexibleMaxX="YES" flexibleMaxY="YES"/> </imageView> <label opaque="NO" userInteractionEnabled="NO" contentMode="left" horizontalHuggingPriority="251" verticalHuggingPriority="251" fixedFrame="YES" text="0" textAlignment="natural" lineBreakMode="tailTruncation" baselineAdjustment="alignBaselines" adjustsFontSizeToFit="NO" translatesAutoresizingMaskIntoConstraints="NO" id="c11-3a-nD8"> <rect key="frame" x="270" y="281" width="52" height="21"/> <autoresizingMask key="autoresizingMask" flexibleMaxX="YES" flexibleMaxY="YES"/> <fontDescription key="fontDescription" name="SpoqaHanSans-Regular" family="SpoqaHanSans" pointSize="17"/> <color key="textColor" red="0.33333333333333331" green="0.33333333333333331" blue="0.33333333333333331" alpha="1" colorSpace="calibratedRGB"/> <nil key="highlightedColor"/> </label> <label opaque="NO" userInteractionEnabled="NO" contentMode="left" horizontalHuggingPriority="251" verticalHuggingPriority="251" fixedFrame="YES" text="[emplus/david.kscho@empluses.com]" textAlignment="center" lineBreakMode="tailTruncation" baselineAdjustment="alignBaselines" adjustsFontSizeToFit="NO" translatesAutoresizingMaskIntoConstraints="NO" id="FZO-er-yGs"> <rect key="frame" x="23" y="318" width="332" height="30"/> <autoresizingMask key="autoresizingMask" widthSizable="YES" flexibleMaxY="YES"/> <fontDescription key="fontDescription" name="SpoqaHanSans-Regular" family="SpoqaHanSans" pointSize="17"/> <nil key="highlightedColor"/> </label> </subviews> <color key="backgroundColor" white="1" alpha="1" colorSpace="calibratedWhite"/> </view> <connections> <outlet property="_backView" destination="cZQ-Jb-Iuv" id="hti-Le-Rra"/> <outlet property="_btnReset" destination="phw-d7-Zsz" id="hVD-Q9-8Xq"/> <outlet property="_btnUpdate" destination="wn5-JQ-qp2" id="o6G-9e-g0S"/> <outlet property="_otpInfo" destination="FZO-er-yGs" id="d1r-2i-KX2"/> <outlet property="_progress" destination="eFk-qb-ugh" id="csW-nT-cyw"/> <outlet property="_remainTime" destination="c11-3a-nD8" id="b6H-g5-lXA"/> <outlet property="_tfOTP" destination="y9V-iO-Xec" id="loX-6A-goi"/> </connections> </viewController> <placeholder placeholderIdentifier="IBFirstResponder" id="GRs-8z-hxZ" userLabel="First Responder" sceneMemberID="firstResponder"/> </objects> <point key="canvasLocation" x="2948" y="440"/> </scene> |
Program example)
| import UIKit class OTPCreateViewController : UIViewController { @IBOutlet weak var _progress: UIProgressView! @IBOutlet weak var _remainTime: UILabel! @IBOutlet weak var _backView: UIImageView! @IBOutlet weak var _otpInfo: UILabel! @IBOutlet weak var _tfOTP: UITextField! @IBOutlet weak var _btnUpdate: UIButton! @IBOutlet weak var _btnReset: UIButton! @IBAction func onClose(_ sender: Any) { exit(0) } var _timer: Timer? var _otp: OTPEntity? = nil override func viewDidLoad() { super.viewDidLoad() //chagneBackground() initControls() makeTappedView() makeOtpInfo() } override func viewWillAppear(_ animated: Bool) { super.viewWillAppear(animated) if (_otp?.IS_DELETE == 1) { _otp?.IS_DELETE = 0 dismiss(animated: false, completion: nil) } } override func viewDidAppear(_ animated: Bool) { super.viewDidAppear(animated) } private func initControls() { _btnUpdate.backgroundColor = uicolorFromHex(rgbValue: 0x1B90FF) _btnReset.backgroundColor = uicolorFromHex(rgbValue: 0x1B90FF) super.modalPresentationStyle = .fullScreen } private func chagneBackground() { // MAIN View Background Change let background = UIImageView(frame: UIScreen.main.bounds) background.image = UIImage(named: "bg_sub.png") self.view.insertSubview(background, at: 0) } private func makeTappedView() { let tap = UITapGestureRecognizer(target: self, action: #selector(OTPCreateViewController.backTapped)) _backView.isUserInteractionEnabled = true _backView.addGestureRecognizer(tap) } private func makeOtpInfo() { let loginid = _otp?.LOGIN_ID ?? "mc529@hanmail.net" let tel = _otp?.PHONE_NO ?? "01027714076" let time = (_otp?.CYCLE_TIME ?? "30")! let otpnum = generateKEYL(loginid, tel, time, "app512") _otpInfo.text = "[ \(_otp?.SYSTEM_NM ?? "")/\(_otp?.LOGIN_ID ?? "") ]" let otpnumStr = String(cString: otpnum!) let start = otpnumStr.index(otpnumStr.startIndex, offsetBy: 0) let end = otpnumStr.index(otpnumStr.startIndex, offsetBy: 3) let start2 = otpnumStr.index(otpnumStr.startIndex, offsetBy: 3) let end2 = otpnumStr.index(otpnumStr.startIndex, offsetBy: 6) _tfOTP.text = otpnumStr[start..<end] + " " + otpnumStr[start2..<end2] var step = 0 self._progress.progress = 0 self._btnReset.isEnabled = false self._btnReset.backgroundColor = uicolorFromHex(rgbValue: 0xA0AAB4) let remain = getRemainingTime(_otp?.CYCLE_TIME ?? "30") let cycle_time = Int(self._otp!.CYCLE_TIME) _timer = Timer.scheduledTimer(withTimeInterval: 1.0, repeats: true, block: { _timer in let change: Float = Float(Double(remain - step - 1) / Double(cycle_time!)) print("---- \(remain),\(change),\(step)") self._progress.progress = change step += 1 self._remainTime.text = String(remain - step) + " " + "TIME".localized if step == remain { self._timer?.invalidate() self._btnReset.isEnabled = true self._btnReset.backgroundColor = uicolorFromHex(rgbValue: 0x1B90FF) } }) } @objc func backTapped(tabGestureRecg: UITapGestureRecognizer) { dismiss(animated: false, completion: nil) // } @IBAction func onEdit(_ sender: Any) { switchScreen("SystemOTP", { _ = ($0 as! OTPInfoSaveViewController).changeMode(.EDIT).setOtp(_otp!).setParent(self) }) } @IBAction func onReset(_ sender: Any) { makeOtpInfo() } func setOtp(_ otp: OTPEntity) { _otp = otp print("--------> \(otp.REG_DT), \(otp.LOGIN_ID), \(otp.SYSTEM_NM), \(otp.CYCLE_TIME)") } @IBAction func onSetting(_ sender: Any) { switchScreen("Settings") } @IBAction func onShare(_ sender: Any) { } } |
2. Server login (using Secure key)
2.1 For Android
The API that generates a one-time authentication key to be entered in the "Verification code" when logging into the server from the BaroPAM app is provided as "barokey.jar". When using Eclipse, "barokey.jar" must be located in the libs directory.

The following code can be inserted into a program that generates a secondary authentication key (one-time authentication key), which is a "Verification code".
| ... import com.barokey.barokey; ... String auth_key = barokey.generateKEYP(secure_key, cycle_time); ... |
| Parameter | Remark | Etc |
| secure_key | The key provided by requesting the vendor can be assigned to each server and account. Be sure to set the key specified when setting the BaroPAM server environment. | |
| cycle_time | Set the generation cycle (3-60 seconds) of the one-time authentication key specified when configuring the BaroPAM server. If the configuration value is different from the BaroPAM server configuration value, a one-time authentication key that is a "Verification code" may be generated differently. |
Screen example)
Screen Layout example)
| <?xml version="1.0" encoding="utf-8"?> xmlns:app="http://schemas.android.com/apk/res-auto" android:layout_width="fill_parent" android:layout_height="fill_parent" android:background="@color/bg_body_default" android:orientation="vertical"> <include android:id="@+id/inc_header" layout="@layout/inc_header" android:layout_width="fill_parent" android:layout_height="@dimen/head_height" /> <ScrollView android:layout_width="match_parent" android:layout_height="match_parent" android:layout_marginLeft="@dimen/body_margin_right_default" android:layout_marginRight="@dimen/body_margin_right_default" android:layout_marginTop="@dimen/head_height"> android:id="@+id/body_frame" android:layout_width="fill_parent" android:layout_height="fill_parent"> <TextView android:layout_width="wrap_content" android:layout_height="wrap_content" android:layout_gravity="center_horizontal" android:layout_marginTop="81dip" android:padding="10dp" android:text="@string/tv_key_vc" android:textColor="@color/text_body_default" android:textSize="20dip" /> <TextView android:id="@+id/tv_auth_key" android:layout_width="fill_parent" android:layout_height="wrap_content" android:layout_gravity="center_horizontal" android:layout_marginTop="150dip" android:background="@android:color/transparent" android:ems="10" android:gravity="center" android:imeOptions="actionGo" android:inputType="text" android:maxLength="8" android:nextFocusDown="@+id/btn_login" android:singleLine="true" android:text="" android:textAppearance="?android:attr/textAppearanceLarge" android:textColor="@color/text_body_default" android:textSize="65dip" /> <TextView android:layout_width="fill_parent" android:layout_height="1dip" android:layout_gravity="center_horizontal" android:layout_marginLeft="50dip" android:layout_marginRight="50dip" android:layout_marginTop="230dip" android:background="@color/line_text_under" android:visibility="invisible" /> <com.beardedhen.androidbootstrap.BootstrapProgressBar android:id="@+id/progressBar" android:layout_width="fill_parent" android:layout_height="12dip" android:layout_gravity="center_horizontal" android:layout_marginTop="240dip" app:animated="true" app:bootstrapBrand="warning" app:bootstrapProgress="100" app:striped="true" /> <LinearLayout android:layout_width="fill_parent" android:layout_height="wrap_content" android:layout_marginTop="260dip" android:orientation="horizontal"> <TextView android:layout_width="fill_parent" android:layout_height="wrap_content" android:layout_weight="1" /> <ImageView android:layout_width="15dip" android:layout_height="15dip" android:layout_gravity="center_vertical|right" android:background="@drawable/ico_countdown" /> <TextView android:id="@+id/tv_remainTime" android:layout_width="wrap_content" android:layout_height="wrap_content" android:gravity="right|center_vertical" android:paddingLeft="10dip" android:textColor="@color/text_body_guide" android:textSize="17dip" /> </LinearLayout> <TextView android:id="@+id/tv_server_name" android:layout_width="wrap_content" android:layout_height="wrap_content" android:layout_gravity="center_horizontal" android:layout_marginTop="315dip" android:text="" android:textColor="@color/text_body_default" android:textSize="18dip" /> <TextView android:layout_width="wrap_content" android:layout_height="wrap_content" android:layout_gravity="center_horizontal" android:layout_marginTop="380dip" android:text="@string/tv_key_msg_1" android:textColor="@color/text_body_guide" android:textSize="18dip" /> <TextView android:layout_width="wrap_content" android:layout_height="wrap_content" android:layout_gravity="center_horizontal" android:layout_marginTop="405dip" android:text="@string/tv_key_msg_2" android:textColor="@color/text_body_guide" android:textSize="18dip" /> <TextView android:layout_width="wrap_content" android:layout_height="wrap_content" android:layout_gravity="center_horizontal" android:layout_marginTop="430dip" android:text="@string/tv_key_msg_3" android:textColor="@color/text_body_guide" android:textSize="18dip" /> <LinearLayout android:layout_width="fill_parent" android:layout_height="wrap_content" android:layout_marginTop="490dip" android:orientation="horizontal"> <Button android:id="@+id/btn_Modify" android:layout_width="fill_parent" android:layout_height="@dimen/btn_height_default" android:layout_weight="1" android:background="@drawable/btn_default_drawable" android:text="@string/btn_upd_del" android:textColor="@color/white" android:textSize="20dip" /> <TextView android:layout_width="6dip" android:layout_height="1dip" android:layout_gravity="center_horizontal" android:background="@android:color/transparent" /> <Button android:id="@+id/btn_reset" android:layout_width="fill_parent" android:layout_height="@dimen/btn_height_default" android:layout_weight="1" android:background="@drawable/btn_default_drawable" android:enabled="false" android:text="@string/btn_reset" android:textColor="@color/white" android:textSize="20dip" /> </LinearLayout> </FrameLayout> </ScrollView> </FrameLayout> |
Program example)
| package com.baro.pam.info; import com.baro.common.base.BaseActivity; import com.baro.common.base.BaseInterface; import com.baro.common.setting.SettingACT; import com.baro.pam.R; import com.barokey.barokey; import com.beardedhen.androidbootstrap.BootstrapProgressBar; import android.content.Context; import android.content.Intent; import android.os.Bundle; import android.os.Message; import android.os.Vibrator; import android.os.Handler; import android.view.View; import android.view.View.OnClickListener; import android.view.inputmethod.InputMethodManager; import android.widget.Button; import android.widget.TextView; import java.util.Date; public class PAMCreateACT extends BaseActivity implements BaseInterface, OnClickListener { private Button btn_setting, btn_share, btn_close, btn_Modify, btn_reset; private TextView tv_auth_key; private TextView tv_server_name; private TextView tv_remainTime; private BootstrapProgressBar progressBar; private String intent_reg_dt = "", intent_server_name = "", intent_hostname = "", intent_secure_key = "", intent_cycle_time = ""; Intent intent; private long createdMillis, remainingSec; private static final int MESSAGE_REFRESH_REMAINING_SECOND = 101; private static final int SENDMESSAGE_INTERVAL = 250; @Override public void onCreate(Bundle savedInstanceState) { try { super.onCreate(savedInstanceState); setContentView(R.layout.act_pamcreate); drawView(); getIntentData(); } catch (Exception e) { e.printStackTrace(); } finally { } } @Override public void onPause() { super.onPause(); if (null != m_handlerProc) { m_handlerProc.removeMessages(MESSAGE_REFRESH_REMAINING_SECOND); } } @Override public void onResume() { super.onResume(); if (null != m_handlerProc) { m_handlerProc.sendEmptyMessageDelayed(MESSAGE_REFRESH_REMAINING_SECOND, SENDMESSAGE_INTERVAL); } } @Override public void drawView() { try { vibe = (Vibrator) getSystemService(Context.VIBRATOR_SERVICE); findViewById(R.id.body_frame).setOnClickListener(new OnClickListener() { public void onClick(View v) { InputMethodManager imm = (InputMethodManager) getSystemService(Context.INPUT_METHOD_SERVICE); imm.hideSoftInputFromWindow(v.getWindowToken(), 0); } }); tv_server_name = (TextView) findViewById(R.id.tv_server_name); tv_server_name.setOnClickListener(this); tv_auth_key = (TextView) findViewById(R.id.tv_auth_key); tv_auth_key.setFocusable(true); tv_auth_key.setClickable(false); progressBar = (BootstrapProgressBar) findViewById(R.id.progressBar); tv_remainTime = (TextView) findViewById(R.id.tv_remainTime); btn_setting = (Button) findViewById(R.id.btn_setting); btn_setting.setOnClickListener(this); btn_share = (Button) findViewById(R.id.btn_share); btn_share.setOnClickListener(this); ((Button) findViewById(R.id.btn_go_back)).setOnClickListener(this); btn_close = (Button) findViewById(R.id.btn_close); btn_close.setOnClickListener(this); btn_Modify = (Button) findViewById(R.id.btn_Modify); btn_Modify.setOnClickListener(this); btn_reset = (Button) findViewById(R.id.btn_reset); btn_reset.setOnClickListener(this); } catch (Exception e) { e.printStackTrace(); } finally { } } public void getIntentData() { try { Intent intent = getIntent(); getDefaultIntent(intent); if (intent.getStringExtra("reg_dt") != null) { intent_reg_dt = intent.getStringExtra("reg_dt").trim(); } if (intent.getStringExtra("server_name") != null) { String[] a_server_name = intent.getStringExtra("server_name").split("/"); for(int ii = 0; ii < a_server_name.length; ii++) { if (ii == 0) { intent_server_name = a_server_name[ii]; } else { intent_hostname = a_server_name[ii]; } } } if (intent.getStringExtra("secure_key") != null) { intent_secure_key = intent.getStringExtra("secure_key").trim(); } if (intent.getStringExtra("cycle_time") != null) { intent_cycle_time = intent.getStringExtra("cycle_time").trim(); } if ("".equals(intent_server_name.trim()) && ("".equals(intent_hostname.trim()))) { tv_server_name.setText(""); } else if ("".equals(intent_server_name.trim())) { tv_server_name.setText("[ " + intent_hostname + " ]"); } else if ("".equals(intent_hostname.trim())) { tv_server_name.setText("[ " + intent_server_name + " ]"); } else { tv_server_name.setText("[ " + intent_server_name + " / " + intent_hostname + " ]"); } if (!"".equals(intent_secure_key) && (!"".equals(intent_cycle_time))) { onAuthKey(); } else { finish(); } } catch (Exception e) { e.printStackTrace(); } finally { } } @Override public void onClick(View v) { try { switch (v.getId()) { case R.id.btn_setting: // Setting Intent intent = new Intent(this, SettingACT.class); intent.setFlags(Intent.FLAG_ACTIVITY_CLEAR_WHEN_TASK_RESET); startActivity(intent); //finish(); break; case R.id.btn_share: intent = new Intent(Intent.ACTION_SEND); intent.addCategory(Intent.CATEGORY_DEFAULT); intent.putExtra(Intent.EXTRA_TEXT , getString(R.string.app_share)); intent.putExtra(Intent.EXTRA_TITLE, getString(R.string.app_name )); intent.setType("text/plain"); startActivity(Intent.createChooser(intent, getString(R.string.share_text))); //finish(); break; case R.id.btn_go_back: // go back finish(); break; case R.id.btn_close: // Close moveTaskToBack(true); finish(); android.os.Process.killProcess(android.os.Process.myPid()); break; case R.id.btn_Modify: // Modify/Delete intent = new Intent(PAMCreateACT.this, PAMModifyACT.class); intent.putExtra("reg_dt" , intent_reg_dt ); intent.putExtra("server_name", intent_server_name); intent.putExtra("hostname" , intent_hostname ); intent.putExtra("secure_key" , intent_secure_key ); intent.putExtra("cycle_time" , intent_cycle_time ); startActivity(intent); finish(); break; case R.id.btn_reset: // Reset if (!"".equals(intent_secure_key) && (!"".equals(intent_cycle_time))) { onAuthKey(); } else { finish(); } break; } } catch (Exception e) { e.printStackTrace(); } finally { } } public void onAuthKey() { try { tv_auth_key.setText(""); createdMillis = estimateCreatedMillis(intent_cycle_time); tv_auth_key.setText(barokey.generateKEYP(intent_secure_key, intent_cycle_time)); m_handlerProc.sendEmptyMessageDelayed(MESSAGE_REFRESH_REMAINING_SECOND, SENDMESSAGE_INTERVAL); } catch (Exception e) { e.printStackTrace(); } finally { } } private final Handler m_handlerProc = new Handler() { @Override public void handleMessage(Message message) { switch (message.what) { case MESSAGE_REFRESH_REMAINING_SECOND: { try { long cycleMillis = (Long.parseLong(intent_cycle_time) * 1000L); long remainingMillis = estimateRemainingMillis(intent_cycle_time, createdMillis); long remainingSecond = remainingMillis != 0 ? (remainingMillis / 1000L) : 0; if (0 < remainingMillis) { m_handlerProc.sendEmptyMessageDelayed(MESSAGE_REFRESH_REMAINING_SECOND, SENDMESSAGE_INTERVAL); btn_reset.setEnabled(false); } else { m_handlerProc.removeMessages(MESSAGE_REFRESH_REMAINING_SECOND); btn_reset.setEnabled(true); } tv_remainTime.setText(remainingSecond + " " + getString(R.string.remain_time_suffix)); if (0 != cycleMillis) { progressBar.setProgress((int) (((float) remainingMillis / (float) cycleMillis) * 100.0F)); } } catch (Exception e) { e.printStackTrace(); } finally { } } break; } } }; public long estimateCreatedMillis(String cycleSecondString) { long remainingMillis = (barokey.getRemainingTime(cycleSecondString) * 1000L) - 200; long cycleMillis = (Long.parseLong(cycleSecondString) * 1000L); long currentMillis = (new Date()).getTime(); long elapsedMillis = cycleMillis - remainingMillis; long createdMillis = currentMillis - elapsedMillis; return createdMillis; } public long estimateRemainingMillis(String cycleSecondString, long createdTime) { long cycleMillis = (Long.parseLong(cycleSecondString) * 1000L); long currentMillis = (new Date()).getTime(); long elapsedMillis = currentMillis - createdTime; long remainingMillis = barokey.getRemainingTime(cycleSecondString) * 1000L; remainingMillis = cycleMillis > elapsedMillis ? remainingMillis : 0; remainingMillis = remainingMillis >= cycleMillis ? 0 : remainingMillis; return remainingMillis; } } |
2.2 For iPhone
The API that creates a one-time authentication key to be entered in the "Verification code" when logging into the server from the BaroPAM app is provided as "libbaroutil.a". This file is a library file for NSObject Interface, which includes barokey, barocrypt, and base64 related libraries.
There are two types of library files. XCode's iPhone simulator and iPhone are both changed to libbaroutil.a if necessary.
- libbaroutil.a.iphone : for iPhone
- libbaroutil.a.simul : for iPhone simulator
This file is registered and used when setting the project of XCode as below.
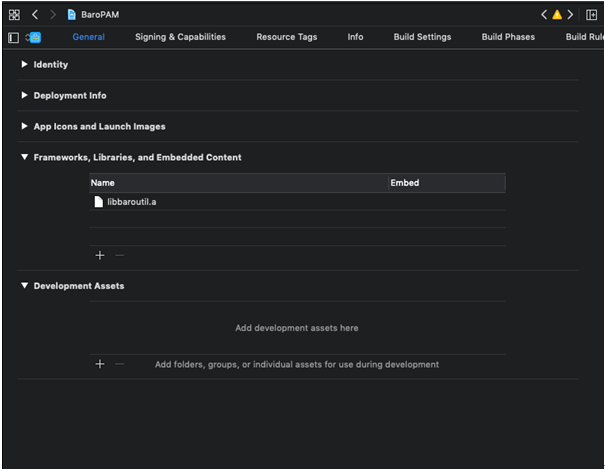
The APIs related to BaroPAM are as follows. Since the function is composed of the C function interface, the input data type is expressed in the C function style. The source of the usage example is code written in iOS swift 5.0 or later.
generateKEYP function
The one-time authentication key used to log in to the server is a function that is generated.
| Input variable | const char *secure_key | The key provided by requesting the vendor can be assigned to each server and account. Be sure to set the key specified when setting the BaroPAM server environment. |
| const char *cycle_time | When configuring the BaroPAM server environment, it must match the one-time authentication key generation cycle (3-60 seconds). If the generation cycle of the one-time authentication key designated for each server is different, the one-time authentication key may be generated differently. |
|
| const char *key_method | "app512" is set as a method of generating a disposable authentication key (app1, app256, app384, app512: app). | |
| Return value | auth key | Returns the generated one-time authentication key. |
Example of use in Swift 5.0 or higher)
| private func makePamInfo() { let secureKey = _pam?.SECURE_KEY let time = (_pam?.CYCLE_TIME ?? "30")! let otpnum = generateKEYP(secureKey, time, "app512") _pamInfo.text = "[ \(_pam?.SERVER_NM ?? "")/\(_pam?.HOSTNAME ?? "") ]" let otpnumStr = String(cString: otpnum!) let start = otpnumStr.index(otpnumStr.startIndex, offsetBy: 0) let end = otpnumStr.index(otpnumStr.startIndex, offsetBy: 3) let start2 = otpnumStr.index(otpnumStr.startIndex, offsetBy: 3) let end2 = otpnumStr.index(otpnumStr.startIndex, offsetBy: 6) _tfOTP.text = otpnumStr[start..<end] + " " + otpnumStr[start2..<end2] var step = 0 self._progress.progress = 0 self._btnReset.isEnabled = false self._btnReset.backgroundColor = uicolorFromHex(rgbValue: 0xA0AAB4) let remain = getRemainingTime(_pam?.CYCLE_TIME ?? "30") let cycle_time = Int(self._pam!.CYCLE_TIME) _timer = Timer.scheduledTimer(withTimeInterval: 1.0, repeats: true, block: { _timer in let change: Float = Float(Double(remain - step - 1) / Double(cycle_time!)) self._progress.progress = change step += 1 self._remainTime.text = String(remain - step) + " " + "TIME".localized if step == remain { self._timer?.invalidate() self._btnReset.isEnabled = true self._btnReset.backgroundColor = uicolorFromHex(rgbValue: 0x1B90FF) } }) } |
Screen example)
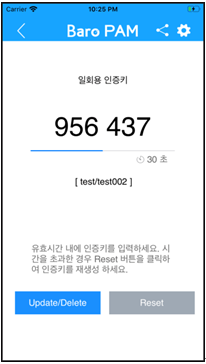
Screen Layout example)
Means Storyboard. Refer to developer.apple.com for the meaning of each parameter.
| <!--Create View Controller--> <scene sceneID="sVy-j4-Rtq"> <objects> <viewController storyboardIdentifier="CreatePAM" id="z9w-lb-ka0" customClass="PAMCreateViewController" customModule="BaroPAM" customModuleProvider="target" sceneMemberID="viewController"> <layoutGuides> <viewControllerLayoutGuide type="top" id="03y-ma-Ukk"/> <viewControllerLayoutGuide type="bottom" id="WKP-o0-5Tt"/> </layoutGuides> <view key="view" contentMode="scaleToFill" id="ZXo-9u-j0g"> <rect key="frame" x="0.0" y="0.0" width="375" height="812"/> <autoresizingMask key="autoresizingMask" widthSizable="YES" heightSizable="YES"/> <subviews> <view contentMode="scaleToFill" fixedFrame="YES" translatesAutoresizingMaskIntoConstraints="NO" id="VzL-Hy-Qth"> <rect key="frame" x="0.0" y="0.0" width="375" height="70"/> <autoresizingMask key="autoresizingMask" widthSizable="YES" flexibleMaxY="YES"/> <subviews> <button opaque="NO" contentMode="scaleToFill" fixedFrame="YES" contentHorizontalAlignment="center" contentVerticalAlignment="center" lineBreakMode="middleTruncation" translatesAutoresizingMaskIntoConstraints="NO" id="PTg-Bp-4P9"> <rect key="frame" x="283" y="35" width="31" height="31"/> <autoresizingMask key="autoresizingMask" flexibleMinX="YES" flexibleMaxY="YES"/> <inset key="imageEdgeInsets" minX="3" minY="3" maxX="3" maxY="3"/> <state key="normal" image="btn_share.png"/> <connections> <action selector="onShare:" destination="VZn-Wm-75J" eventType="touchUpInside" id="2al-2K-VMV"/> <action selector="onShare:" destination="z9w-lb-ka0" eventType="touchUpInside" id="Hvz-hY-Yno"/> </connections> </button> <button opaque="NO" contentMode="scaleToFill" fixedFrame="YES" contentHorizontalAlignment="center" contentVerticalAlignment="center" lineBreakMode="middleTruncation" translatesAutoresizingMaskIntoConstraints="NO" id="eey-kg-khO"> <rect key="frame" x="322" y="34" width="33" height="32"/> <autoresizingMask key="autoresizingMask" flexibleMinX="YES" flexibleMaxY="YES"/> <inset key="imageEdgeInsets" minX="3" minY="3" maxX="3" maxY="3"/> <state key="normal" image="btn_setting.png"/> <connections> <action selector="onSetting:" destination="z9w-lb-ka0" eventType="touchUpInside" id="UHA-w0-txo"/> <action selector="onSetting:" destination="VZn-Wm-75J" eventType="touchUpInside" id="qN9-C1-NKq"/> </connections> </button> <imageView contentMode="scaleAspectFit" horizontalHuggingPriority="251" verticalHuggingPriority="251" fixedFrame="YES" image="btn_prev.png" translatesAutoresizingMaskIntoConstraints="NO" id="FyA-Yo-4LD"> <rect key="frame" x="19" y="35" width="31" height="31"/> <autoresizingMask key="autoresizingMask" flexibleMaxX="YES" heightSizable="YES"/> </imageView> <imageView userInteractionEnabled="NO" contentMode="scaleAspectFit" horizontalHuggingPriority="251" verticalHuggingPriority="251" fixedFrame="YES" image="logo_barootp.png" translatesAutoresizingMaskIntoConstraints="NO" id="AWz-gv-3pq"> <rect key="frame" x="115" y="38" width="145" height="25"/> <autoresizingMask key="autoresizingMask" flexibleMaxX="YES" flexibleMaxY="YES"/> </imageView> </subviews> <color key="backgroundColor" red="0.1058823529" green="0.56470588239999997" blue="1" alpha="1" colorSpace="calibratedRGB"/> </view> <textView clipsSubviews="YES" multipleTouchEnabled="YES" contentMode="scaleToFill" fixedFrame="YES" text="TITLE MESSAGE" textAlignment="center" translatesAutoresizingMaskIntoConstraints="NO" id="6al-WL-OdK"> <rect key="frame" x="0.0" y="125" width="375" height="40"/> <autoresizingMask key="autoresizingMask" widthSizable="YES" flexibleMaxY="YES"/> <color key="textColor" white="0.0" alpha="1" colorSpace="calibratedWhite"/> <fontDescription key="fontDescription" name="SpoqaHanSans-Regular" family="SpoqaHanSans" pointSize="17"/> <textInputTraits key="textInputTraits" autocapitalizationType="sentences"/> </textView> <textField opaque="NO" clipsSubviews="YES" contentMode="scaleToFill" fixedFrame="YES" contentHorizontalAlignment="left" contentVerticalAlignment="center" text="12345678" textAlignment="center" minimumFontSize="17" translatesAutoresizingMaskIntoConstraints="NO" id="N6N-XM-0BH"> <rect key="frame" x="19" y="204" width="336" height="52"/> <autoresizingMask key="autoresizingMask" widthSizable="YES" flexibleMaxY="YES"/> <color key="backgroundColor" white="1" alpha="1" colorSpace="calibratedWhite"/> <fontDescription key="fontDescription" name="SpoqaHanSans-Regular" family="SpoqaHanSans" pointSize="50"/> <textInputTraits key="textInputTraits"/> </textField> <button opaque="NO" contentMode="scaleToFill" fixedFrame="YES" contentHorizontalAlignment="center" contentVerticalAlignment="center" buttonType="roundedRect" lineBreakMode="middleTruncation" translatesAutoresizingMaskIntoConstraints="NO" id="jvU-oe-4pE"> <rect key="frame" x="23" y="683" width="160" height="43"/> <autoresizingMask key="autoresizingMask" widthSizable="YES" flexibleMaxX="YES" flexibleMinY="YES"/> <fontDescription key="fontDescription" name="SpoqaHanSans-Regular" family="SpoqaHanSans" pointSize="17"/> <state key="normal" title="Modify/Delete"> <color key="titleColor" white="1" alpha="1" colorSpace="calibratedWhite"/> </state> <connections> <action selector="onEdit:" destination="BPh-Tl-Gd5" eventType="touchUpInside" id="0YZ-mm-tgY"/> <action selector="onEdit:" destination="z9w-lb-ka0" eventType="touchUpInside" id="5bi-1P-cae"/> <action selector="onOk:" destination="BYZ-38-t0r" eventType="touchUpInside" id="K5T-jU-wz5"/> </connections> </button> <button opaque="NO" contentMode="scaleToFill" fixedFrame="YES" contentHorizontalAlignment="center" contentVerticalAlignment="center" buttonType="roundedRect" lineBreakMode="middleTruncation" translatesAutoresizingMaskIntoConstraints="NO" id="0Ma-U8-E40"> <rect key="frame" x="199" y="683" width="160" height="43"/> <autoresizingMask key="autoresizingMask" flexibleMinX="YES" widthSizable="YES" flexibleMinY="YES"/> <fontDescription key="fontDescription" name="SpoqaHanSans-Regular" family="SpoqaHanSans" pointSize="17"/> <state key="normal" title="Reset"> <color key="titleColor" white="1" alpha="1" colorSpace="calibratedWhite"/> </state> <connections> <action selector="onReset:" destination="BPh-Tl-Gd5" eventType="touchUpInside" id="5pN-uP-iTd"/> <action selector="onReset:" destination="z9w-lb-ka0" eventType="touchUpInside" id="bFb-Wq-VEE"/> </connections> </button> <textView clipsSubviews="YES" multipleTouchEnabled="YES" contentMode="scaleToFill" fixedFrame="YES" editable="NO" text="USER DEFINED MESSAGE." textAlignment="natural" selectable="NO" translatesAutoresizingMaskIntoConstraints="NO" id="tvu-My-d27"> <rect key="frame" x="48" y="585" width="276" height="112"/> <autoresizingMask key="autoresizingMask" widthSizable="YES" flexibleMinY="YES"/> <color key="textColor" red="0.33333333333333331" green="0.33333333333333331" blue="0.33333333333333331" alpha="1" colorSpace="calibratedRGB"/> <fontDescription key="fontDescription" name="SpoqaHanSans-Regular" family="SpoqaHanSans" pointSize="17"/> <textInputTraits key="textInputTraits" autocapitalizationType="sentences"/> </textView> <progressView opaque="NO" contentMode="scaleToFill" verticalHuggingPriority="750" fixedFrame="YES" progress="0.5" translatesAutoresizingMaskIntoConstraints="NO" id="OPH-FY-y7I"> <rect key="frame" x="52" y="274" width="270" height="2"/> <autoresizingMask key="autoresizingMask" widthSizable="YES"/> </progressView> <imageView userInteractionEnabled="NO" contentMode="scaleToFill" horizontalHuggingPriority="251" verticalHuggingPriority="251" fixedFrame="YES" image="ico_countdown.png" translatesAutoresizingMaskIntoConstraints="NO" id="NCT-hK-zKs"> <rect key="frame" x="250" y="284" width="15" height="15"/> <autoresizingMask key="autoresizingMask" flexibleMaxX="YES" flexibleMaxY="YES"/> </imageView> <label opaque="NO" userInteractionEnabled="NO" contentMode="left" horizontalHuggingPriority="251" verticalHuggingPriority="251" fixedFrame="YES" text="0" textAlignment="natural" lineBreakMode="tailTruncation" baselineAdjustment="alignBaselines" adjustsFontSizeToFit="NO" translatesAutoresizingMaskIntoConstraints="NO" id="csq-gk-Jba"> <rect key="frame" x="270" y="281" width="52" height="21"/> <autoresizingMask key="autoresizingMask" flexibleMaxX="YES" flexibleMaxY="YES"/> <fontDescription key="fontDescription" name="SpoqaHanSans-Regular" family="SpoqaHanSans" pointSize="17"/> <color key="textColor" red="0.33333333333333331" green="0.33333333333333331" blue="0.33333333333333331" alpha="1" colorSpace="calibratedRGB"/> <nil key="highlightedColor"/> </label> <label opaque="NO" userInteractionEnabled="NO" contentMode="left" horizontalHuggingPriority="251" verticalHuggingPriority="251" fixedFrame="YES" text="[david.kscho@empluses.com]" textAlignment="center" lineBreakMode="tailTruncation" baselineAdjustment="alignBaselines" adjustsFontSizeToFit="NO" translatesAutoresizingMaskIntoConstraints="NO" id="jeL-QQ-baB"> <rect key="frame" x="23" y="318" width="332" height="30"/> <autoresizingMask key="autoresizingMask" widthSizable="YES" flexibleMaxY="YES"/> <fontDescription key="fontDescription" name="SpoqaHanSans-Regular" family="SpoqaHanSans" pointSize="17"/> <nil key="highlightedColor"/> </label> </subviews> <color key="backgroundColor" white="1" alpha="1" colorSpace="calibratedWhite"/> </view> <connections> <outlet property="_backView" destination="FyA-Yo-4LD" id="bIF-3v-gYz"/> <outlet property="_btnReset" destination="0Ma-U8-E40" id="clb-lR-Fiy"/> <outlet property="_btnModify" destination="jvU-oe-4pE" id="6lc-hF-FDd"/> <outlet property="_pamInfo" destination="jeL-QQ-baB" id="sz4-CU-yOh"/> <outlet property="_progress" destination="OPH-FY-y7I" id="5Uc-Je-MGC"/> <outlet property="_remainTime" destination="csq-gk-Jba" id="AX4-sQ-kSL"/> <outlet property="_tfOTP" destination="N6N-XM-0BH" id="0G3-0E-Faf"/> </connections> </viewController> <placeholder placeholderIdentifier="IBFirstResponder" id="5TR-YP-Zsu" userLabel="First Responder" sceneMemberID="firstResponder"/> </objects> <point key="canvasLocation" x="2948" y="-243.10344827586209"/> </scene> |
Program example)
| import UIKit class PAMCreateViewController: UIViewController { @IBOutlet weak var _backView: UIImageView! @IBOutlet weak var _progress: UIProgressView! @IBOutlet weak var _remainTime: UILabel! @IBOutlet weak var _pamInfo: UILabel! @IBOutlet weak var _tfOTP: UITextField! @IBOutlet weak var _btnModify: UIButton! @IBOutlet weak var _btnReset: UIButton! var _timer: Timer? var _pam: PAMEntity? = nil override func viewDidLoad() { super.viewDidLoad() initControls() makeTappedView() makePamInfo() } override func viewWillAppear(_ animated: Bool) { super.viewWillAppear(animated) if (_pam?.IS_DELETE == 1) { _pam?.IS_DELETE = 0 dismiss(animated: false, completion: nil) } } override func viewDidAppear(_ animated: Bool) { super.viewDidAppear(animated) } private func initControls() { _btnModify.backgroundColor = uicolorFromHex(rgbValue: 0x1B90FF) _btnReset.backgroundColor = uicolorFromHex(rgbValue: 0x1B90FF) } private func makeTappedView() { let tap = UITapGestureRecognizer(target: self, action: #selector(PAMCreateViewController.backTapped)) _backView.isUserInteractionEnabled = true _backView.addGestureRecognizer(tap) } @objc func backTapped(tabGestureRecg: UITapGestureRecognizer) { dismiss(animated: false, completion: nil) // } private func makePamInfo() { let secureKey = _pam?.SECURE_KEY let time = (_pam?.CYCLE_TIME ?? "30")! let otpnum = generateKEYP(secureKey, time, "app512") //print( "generateTOTPP ====> \(String(describing: secureKey)), \(String(cString: otpnum!)) " ) _pamInfo.text = "[ \(_pam?.SERVER_NM ?? "")/\(_pam?.HOSTNAME ?? "") ]" let otpnumStr = String(cString: otpnum!) let start = otpnumStr.index(otpnumStr.startIndex, offsetBy: 0) let end = otpnumStr.index(otpnumStr.startIndex, offsetBy: 3) let start2 = otpnumStr.index(otpnumStr.startIndex, offsetBy: 3) let end2 = otpnumStr.index(otpnumStr.startIndex, offsetBy: 6) _tfOTP.text = otpnumStr[start..<end] + " " + otpnumStr[start2..<end2] var step = 0 self._progress.progress = 0 self._btnReset.isEnabled = false self._btnReset.backgroundColor = uicolorFromHex(rgbValue: 0xA0AAB4) let remain = getRemainingTime(_pam?.CYCLE_TIME ?? "30") let cycle_time = Int(self._pam!.CYCLE_TIME) _timer = Timer.scheduledTimer(withTimeInterval: 1.0, repeats: true, block: { _timer in let change: Float = Float(Double(remain - step - 1) / Double(cycle_time!)) //print("---- \(remain),\(change),\(step)") self._progress.progress = change step += 1 self._remainTime.text = String(remain - step) + " " + "TIME".localized if step == remain { self._timer?.invalidate() self._btnReset.isEnabled = true self._btnReset.backgroundColor = uicolorFromHex(rgbValue: 0x1B90FF) } }) } func setPam(_ pam: PAMEntity) { _pam = pam } @IBAction func onEdit(_ sender: Any) { switchScreen("SystemPAM", { _ = ($0 as! PAMInfoSaveViewController).changeMode(.EDIT).setPam(_pam!).setParent(self) }) } @IBAction func onReset(_ sender: Any) { makePamInfo() } @IBAction func onShare(_ sender: Any) { } @IBAction func onSetting(_ sender: Any) { switchScreen("Settings") } } |
2. BaroPAM Website
Also, through the BaroPAM website (www.baropam.com), so that the service is not interrupted when there is a problem with the BaroPAM app (for Android phones and iPhones), which is a generator of disposable authentication keys to be entered in the verification code when logging into information assets. Provide services.
The "BaroPAM" web screen is largely composed of membership registration, login, server information management, login information management, PIN information management, Access log management, Abort, and Logout.
2.1 Using the BaroPAM Web(Membership registration)
1. Activate the app by clicking the icon of the "web browser" app on your smartphone, and then enter the URL of BaroPAM's website, www.baropam.com, in the "Enter search term or URL" field at the top of the app.
For Android phones)

For iPhones)
2. When the BaroPAM website is activated, the following "BaroPAM" login screen appears.
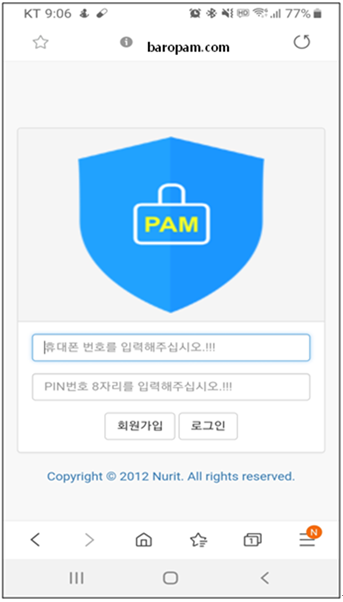
If you are using the "BaroPAM" website (www.baropam.com) for the first time, enter the "회원가입(Sign Up)" button, or if you have already used it, enter your 11-digit mobile phone number and 8-digit PIN number and click the "로그인(Login)" button.
3. If you are not registered as a member (for the first time using the "BaroPAM" website), click the "회원가입(Sign Up)" button and the following screen will appear.
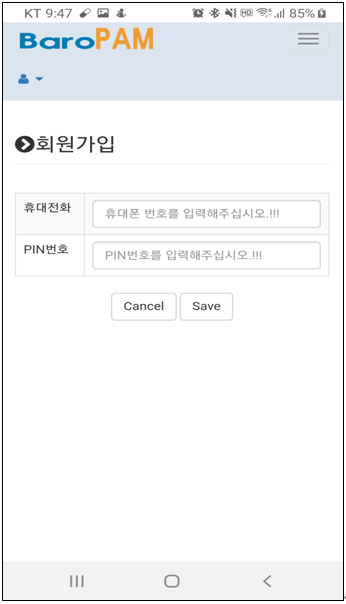
The PIN number is used to prevent the leakage of authentication key information by others when the mobile phone is lost.
4. Enter the 11-digit number and 8-digit PIN number of your mobile phone and click the "Save" button.
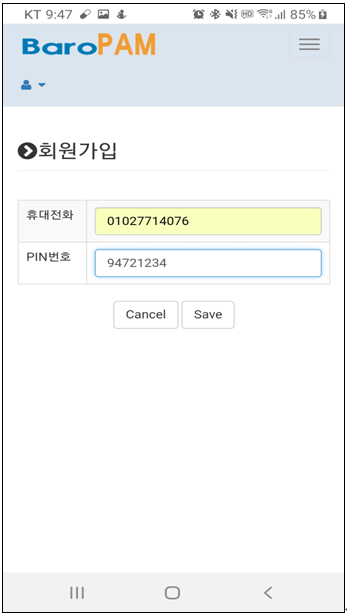
Clicking the "Save" button first checks the validity of the input items and then saves the membership information.
If the mobile phone number is not 11 digits, the message "휴대번호를 입력해주십시요.(Please enter your mobile number)" will appear on the screen. Similarly, if the PIN number is not 8 digits, the message "PIN 번호를 입력해주십시오.(Please enter the PIN number)" appears on the screen.
If the member registration information is not completed normally, the "회원가입(Sign Up)" screen will continue, and if it is completed normally, the above "로그인(Login)" screen will appear.
Click the "Cancel" button to exit the current screen and the above "로그인(Login)" screen will appear.
2.2 Using the BaroPAM Web(Login)
1. Enter the 11-digit mobile number and 8-digit PIN number you set on the login screen, then click the "로그인(Login)" button.
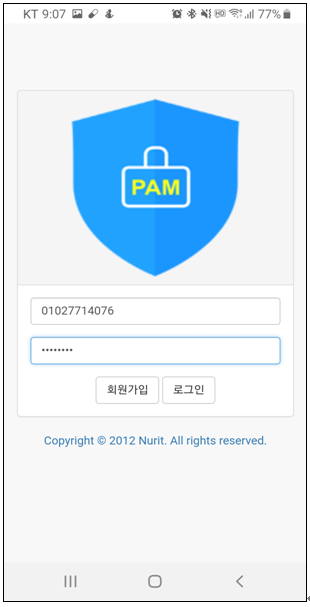
When you click the "로그인(Login)" button, the first step is to check the validity of the input items.
If the mobile phone number is not 11 digits, the message "휴대번호를 입력해주십시요.(Please enter your mobile number)" appears on the message screen. if the PIN number is not 8 digits, the message "PIN 번호를 입력해주십시오.(Please enter the PIN number)" appears on the screen.
If the entered mobile phone number is wrong, the message "휴대폰 번호를 확인해주세요.(Please check your mobile phone number)" and the "PIN 번호를 확인해주세요.(Please check your PIN number)" message will appear on the screen if the PIN number is incorrect.
2. When login is confirmed, the "로그인 정보 관리(Login Information Management)" screen appears as follows.
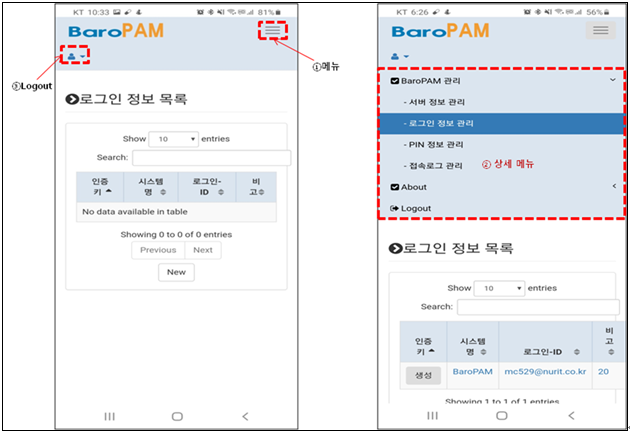
The "로그인 정보 관리(login information management" screen manages information for generating a "one-time authentication key" to replace the password when logging in to the application.
Click the "① 메뉴(Menu)" button to display the "② 상세 메뉴(Detailed Menu)" that you can select as shown on the right screen. Click the "③ Logout" button to exit the "BaroPAM" website (www.baropam.com) screen and click " The "Login" screen appears.
2.3 Using the BaroPAM Web(Login information management)
1. Click the "메뉴(Menu)" button at the top right and then click the "로그인 정보 관리(Login Information Management)" menu in the detailed menu, and the "Login Information Management" screen appears as follows.
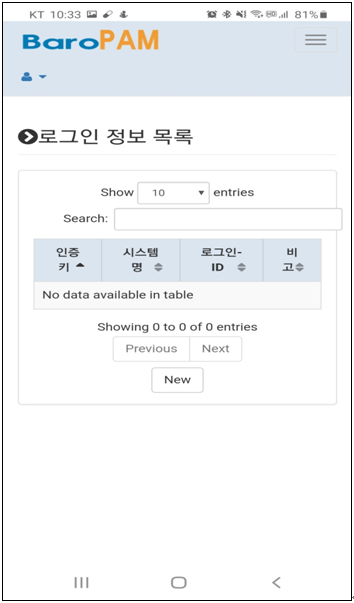
2. Click the "New" button on the "로그인 정보 관리(Login Information Management)" screen to display the screen for registering information on application login as follows.

▣시스템명(System name)
The system name to log in is a required field. You can enter at least 1 digit and up to 60 digits.
▣로그인-ID(Login-ID)
Login-ID is a required field and you can enter at least 1 digit and up to 50 digits.
▣생성주기(Auth key cycle time, 3~60 second)
Auth key cycle time is a mandatory input item and can be specified for a minimum of 3 seconds and a maximum of 60 seconds.
If the generation cycle (Auth key cycle time) of the BaroPAM verification module is different from the generation cycle (Auth key cycle time) specified on the web, a one-time authentication key may be different and login may fail. Can be.
3. After entering the application login information, click the "Save" button.
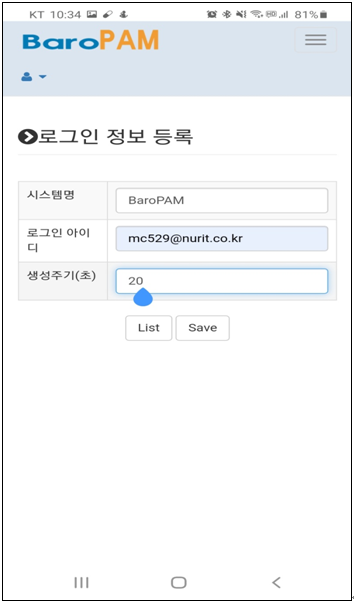
Clicking the "Save" button first checks the validity of the input items and then proceeds to save the login information.
If the system name is not entered, the message "시스템명을 입력해주십시오.(Please enter the system name)" appears on the screen.
If Login-ID is not entered, the message "로그인-ID를 입력해주십시오.(Please enter Login-ID)" appears on the screen.
If the auth key cycle time is not entered or is out of range, the message "인증키 생성주기를 입력 또는 확인해주십시오.(Please enter or confirm the auth key cycle)" appears on the screen.
Clicking the "List" button exits the current screen and displays the "로그인 정보 목록(Login Information List)" screen.
4. If the information saving for the application login is not completed normally, the "로그인 정보 등록(Login Information Registration)" screen continues, and if it is completed normally, the "로그인 정보 목록(Login Information List)" screen appears as follows.
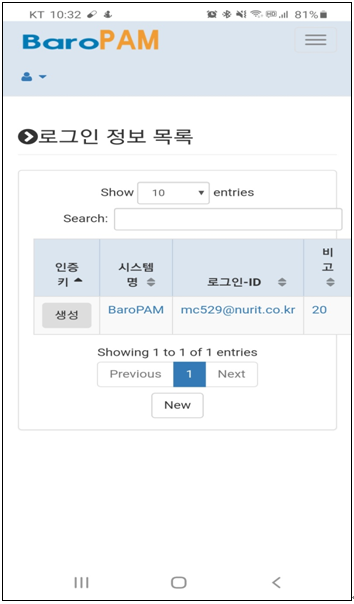
If you want to search for login information, enter a search term and click the "Search" button to display the searched login information on the screen.
If you need to add new login information, click the "New" button and a screen to register login information appears.
5. Clicking the "생성(Generate)" button in the login information list creates a new secondary authentication key (one-time authentication key). During the authentication key cycle time, the same secondary authentication key (one-time authentication key) is generated. Occurs, and the newly created one-time authentication key appears on the "일회용 인증키 생성(Generate one-time authentication key)" screen as follows.
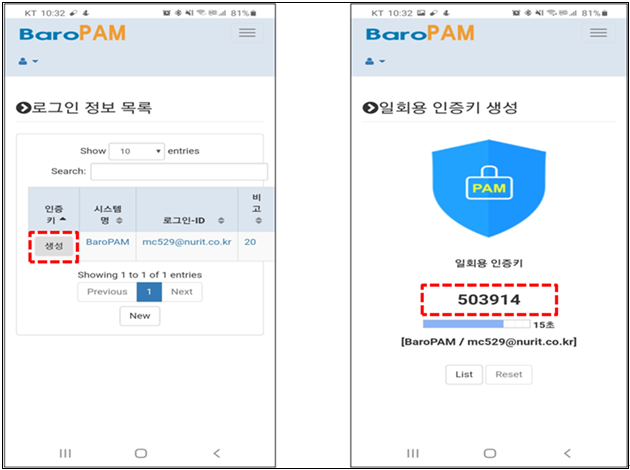
Clicking the "List" button exits the current screen and displays the "로그인 정보 목록(Login Information List)" screen.
When the "Reset" button is clicked, a new one-time authentication key is generated on the "일회용 인증키 생성(Generate one-time authentication key)" screen.
6. If you need to generate a second authentication key (one-time authentication key) and modify/delete login information, click the information item for application login in the login information list as follows.
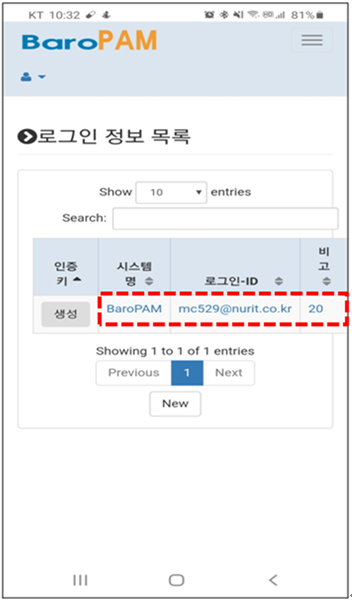
7. Then, the following screen appears to create, modify/delete a secondary authentication key (one-time authentication key) based on information about application login.
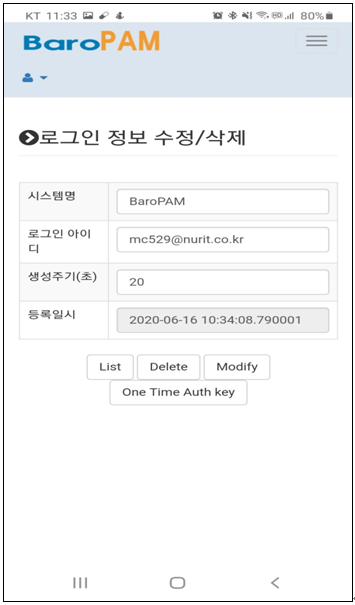
▣시스템명(System name)
The system name to log in is a required field. You can enter at least 1 digit and up to 60 digits.
▣로그인-id(Login-ID)
Login-ID is a required field. You can enter at least 1 digit and up to 50 digits.
▣생성주기(Auth key cycle time, 3~60 second)
Auth key cycle time is a mandatory input item and can be specified for a minimum of 3 seconds and a maximum of 60 seconds.
If the generation cycle (Auth key cycle time) of the BaroPAM verification module is different from the generation cycle (Auth key cycle time) specified on the web, a one-time authentication key may be different and login may fail. Can be.
If the system name is not entered, the message "시스템명을 입력해주십시오.(Please enter the system name)" appears on the screen.
If Login-ID is not entered, the message "로그인-ID를 입력해주십시오.(Please enter Login-ID)" appears on the screen.
If the auth key cycle time is not entered or is out of range, the message "인증키 생성주기를 입력 또는 확인해주십시오.(Please enter or confirm the auth key cycle)" appears on the screen.
If the login information modification or deletion is not completed normally, the "로그인 정보 수정/삭제(Modify/Delete Login Information)" screen continues, and when completed normally, the "로그인 정보 목록(Login Information List)" screen appears.
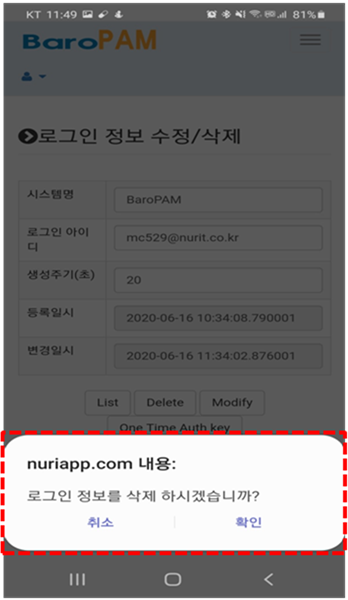
When the "Modify" button is clicked, the validity of the input items is checked first, and then the information on application login is corrected.
When the "Modify" button is clicked, the validity of the input items is checked first, and then the information on application login is corrected.
When you click the "Delete" button, a message box appears, "로그인 정보를 삭제 하시겠습니까?(Are you sure you want to delete the login information?)" If you click the "확인(OK)" button, the operation of deleting the information for the application log-in is performed. If you click the "취소(Cancel)" button, the deletion is performed. The job is canceled.
Clicking the "List" button exits the current screen and displays the "로그인 정보 목록(Login Information List)" screen.
Clicking the "One Time Auth key" button creates a new secondary authentication key (one-time authentication key). During the authentication key cycle time, the same secondary authentication key (one-time authentication key) is generated. The newly created one-time authentication key appears on the "일회용 인증키 생성(Generate one-time authentication key)" screen as follows.
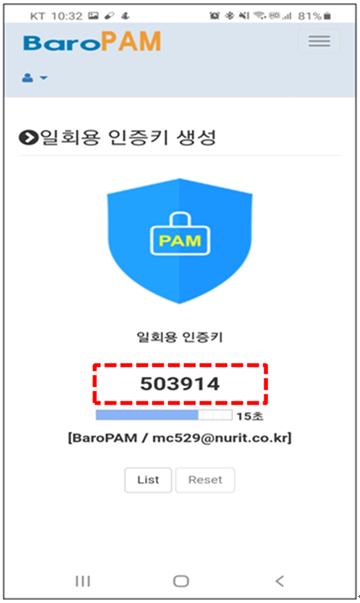
Clicking the "List" button exits the current screen and displays the "로그인 정보 목록(Login Information List)" screen.
When the "Reset" button is clicked, a new one-time authentication key is generated on the "일회용 인증키 생성(Generate one-time authentication key)" screen.
2.4 Using the BaroPAM Web(Server information management)
1. Click the "메뉴(Menu)" button at the top right and then click the "서버 정보 관리(Server Information Management)" menu in the detailed menu, and the "서버 정보 목록(Server Information List)" screen appears as shown below.

2. If you click the "New" button in the "서버 정보 목록(Server Information List)" screen, a screen to register information for the server appears as follows.
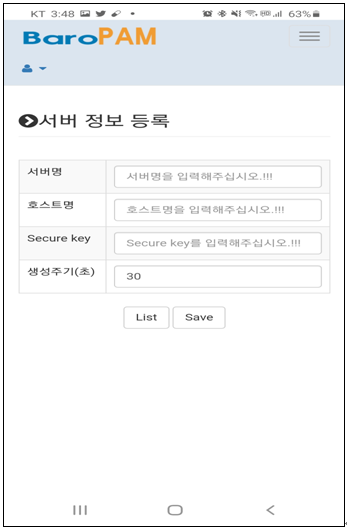
▣서버명(Server name)
The server name on which BaroPAM will be operated is a required field and can be entered at least 1 digit or up to 30 digits.
▣Secure key
Secure key given by information asset or account is a required input item, and you must enter the one requested by the vendor.
If you enter a random "Secure key" that has not been granted by the vendor, an incorrect one-time authentication key is given and you may not be able to log in to the information asset.
If the secure key set in the information asset and the secure key designated by the app are different, the one-time authentication key is different and you may not be able to login.
▣생성주기(Auth key cycle time, 3~60 second)
Auth key cycle time is a mandatory input item and can be specified for a minimum of 3 seconds and a maximum of 60 seconds.
If the one-time authentication key generation cycle (Auth key cycle time) set in the information asset and the one-time authentication key generation cycle (Auth key cycle time) specified in the app are different, the one-time authentication key is different. So there may be cases where you cannot log in.
3. After entering the server information, click the "Save" button.
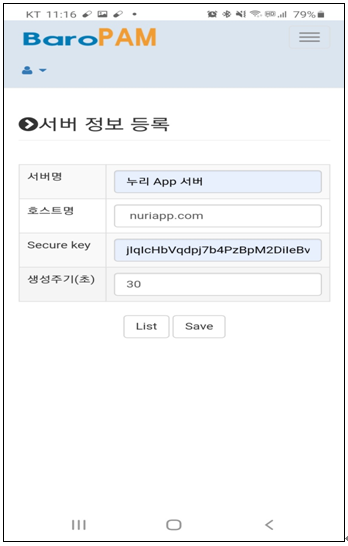
Clicking the "Save" button first checks the validity of the input items and then proceeds to save the information on the information asset.
If the information asset name (Server name) is not entered, the message "서버명을 입력해주십시오.(Please enter the server name)" will appear on the screen.
If a secure key is not entered, the message "Secure key를 입력해주십시오.(Please enter a secure key)" appears on the screen.
If the auth key cycle time is not entered or is out of range, the message "인증키 생성주기를 입력 또는 확인해주십시오.(Please enter or confirm the auth key cycle)" appears on the screen.
Clicking the "List" button exits the current screen and displays the "서버 정보 목록(Server Information List)" screen.
4. If the information storage for the server is not completed normally, the "서버 정보 등록(Register Server Information)" screen continues, and if it is completed normally, the "서버 정보 목록(Server Information List)" screen appears as follows.

If you want to search for server information, enter a search term and click the "Search" button to display the searched server information on the screen.
If you need to add new server information, click the "New" button and a screen to register server information appears.
5. When you click the "생성(Generate)" button in the server information list, a new secondary authentication key (one-time authentication key) is generated. During the authentication key cycle time, the same secondary authentication key (one-time authentication key) is generated. Occurs, and the newly created one-time authentication key appears on the "일회영 인증키 생성(Generate one-time authentication key" screen as follows.
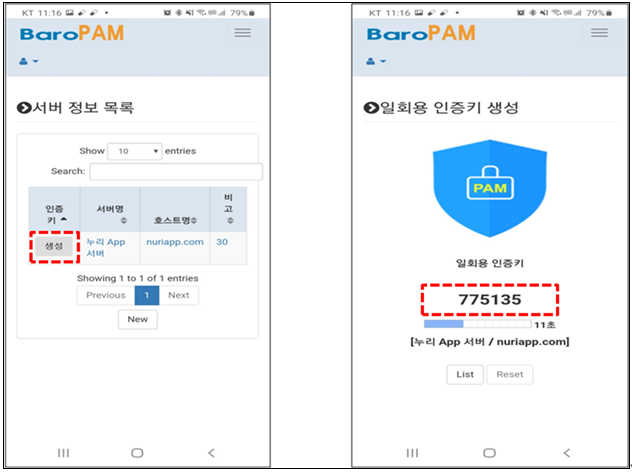
Clicking the "List" button exits the current screen and displays the " 서버 정보 목록(Server Information List)" screen.
When the "Reset" button is clicked, a new one-time authentication key is generated on the "일회용 인증키 생성(Generate one-time authentication key)" screen.
6. If you need to generate a second authentication key (one-time authentication key) and MODIFY/delete server information, click the information item for the server in the server information list as follows.
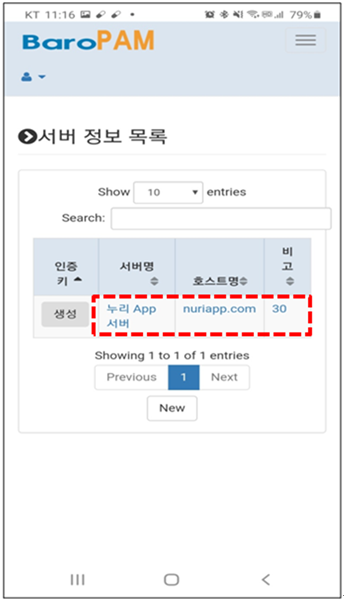
7. Then, the following screen appears to create, modify/delete a secondary authentication key (one-time authentication key) based on information about the server.
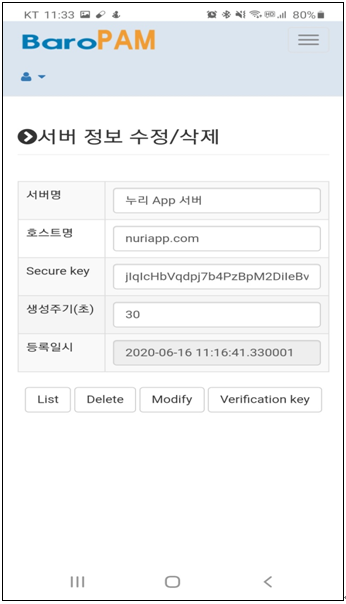
▣서버명(Server name)
The server name on which BaroPAM will be operated is a required field and can be entered at least 1 digit or up to 30 digits.
▣Secure key
Secure key given by information asset or account is a required input item, and you must enter the one requested by the vendor.
If you enter a random "Secure key" that has not been granted by the vendor, an incorrect one-time authentication key is given and you may not be able to log in to the information asset.
If the secure key set in the information asset and the secure key designated by the app are different, the one-time authentication key is different and you may not be able to login.
▣생성주기(Auth key cycle time, 3~60 second)
Auth key cycle time is a mandatory input item and can be specified for a minimum of 3 seconds and a maximum of 60 seconds.
If the one-time authentication key generation cycle (Auth key cycle time) set in the information asset and the one-time authentication key generation cycle (Auth key cycle time) specified in the app are different, the one-time authentication key is different. So there may be cases where you cannot log in.
Click the "Delete" button to delete the information on the information asset.
Clicking the "Modify" button first checks the validity of the input items and then proceeds to modify the information on the information asset.
If the information asset name (Server name) is not entered, the message "서버명을 입력해주십시오.(Please enter the server name)" will appear on the screen.
If a secure key is not entered, the message "Secure key를 입력해주십시오.(Please enter a secure key)" appears on the screen.
If the auth key cycle time is not entered or is out of range, the message "인증키 생성주기를 입력 또는 확인해주십시오.(Please enter or confirm the auth key cycle)" appears on the screen.
If the modification or deletion of information on the information asset is not completed normally, the "서버 정보 수정/삭제(Server information modification/deletion)" screen will continue. The "서버 정보 목록(Server Information List)" screen as shown in the figure appears.
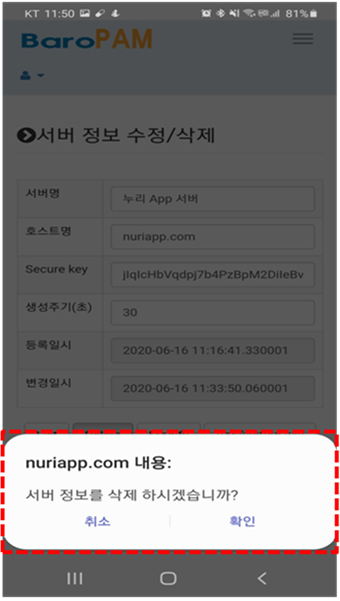
If you click the "Modify" button, the first step is to check the validity of the input items and then modify the information on the server.
Click the "Delete" button to display the message box "서버 정보를 삭제 하시겠습니까?(Are you sure you want to delete the server information?)" Click the "확인(OK)" button to proceed to delete the information for the server. Click the "취소(Cancel)" button to delete it. It is canceled.
Clicking the "List" button exits the current screen and displays the "서버 정보 목록(Server Information List)" screen.
Clicking the "One Time Auth key" button creates a new secondary authentication key (one-time authentication key). During the authentication key cycle time, the same secondary authentication key (one-time authentication key) is generated. The newly created one-time authentication key appears on the "일회용 인증키 생성(Generate one-time authentication key)" screen as follows.
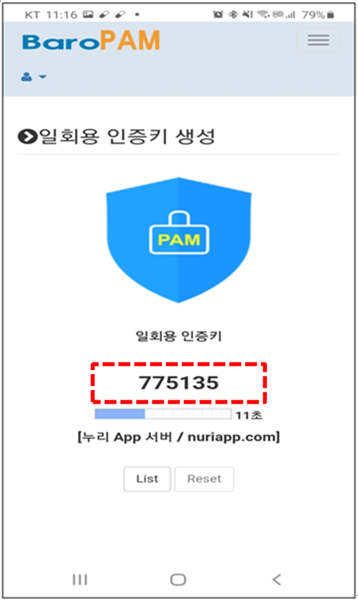
Clicking the "List" button exits the current screen and displays the "서버 정보 목록(Server Information List)" screen.
When the "Reset" button is clicked, a new one-time authentication key is generated on the "일회용 인증키 생성(Generate one-time authentication key)" screen.
2.5 Using the BaroPAM Web(PIN information management)
1. Click the "메뉴(Menu)" button at the top right and then click the "PIN 정보 관리(Manage PIN Information)" menu in the detailed menu, and the "PIN 정보 변경(Modify PIN Information)" screen appears as follows.
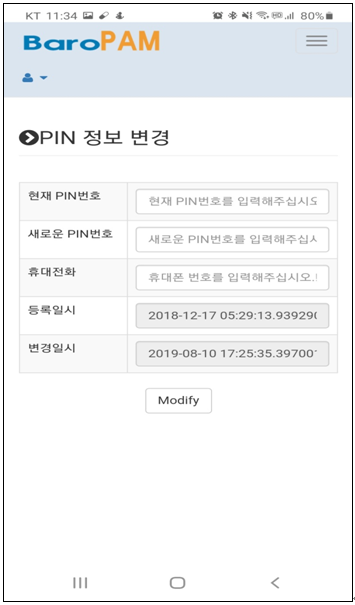
▣현재 PIN 번호(Current PIN number)
Enter 8 digits of the currently set PIN number.
▣새로운 PIN 번호(New PIN number)
Enter the 8-digit PIN number to be set.
▣휴대전화(Cell Phone)
Enter 11 digits for the number of your mobile phone.
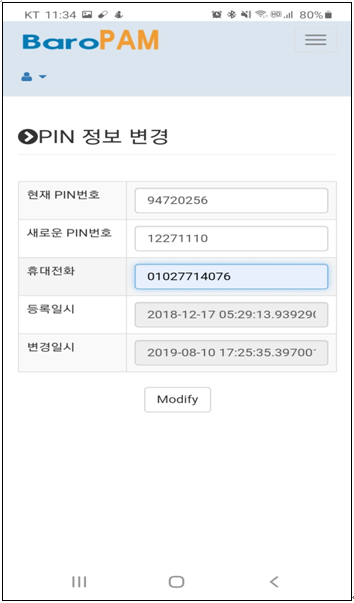
If you click the "Modify" button, the first step is to check the validity of the input items and then save the new PIN number.
If the PIN number is not 8 digits, the message "현재 PIN번호를 확인해주십시오.(Please confirm the current PIN number)" appears on the screen.
If the currently set PIN number is different from the newly entered PIN number, the message "현재 PIN번호가 틀립니다.(The current PIN number is incorrect)" appears on the screen.
If the currently set PIN number and the new PIN number are the same, the message "현재, 새로운 PIN번호가 동일합니다.(Currently, the new PIN number is the same)" appears on the screen.
If the new PIN number is not 8 digits, the message "새로운 PIN번호를 확인해주십시오.(Please confirm the new PIN number)" appears on the screen.
If the mobile phone number is not 11 digits, the message "휴대폰 번호를 확인해주십시오.(Please check your mobile phone number)" appears on the screen.
If the currently set mobile phone number and the entered mobile phone number are different, the message "휴대폰 번호가 틀립니다.(The mobile phone number is incorrect)" appears on the screen.
If saving of the new PIN number is not completed normally, the "PIN 정보 변경(Modify PIN Information)" screen continues, and when it is completed normally, the "로그인(Login)" screen appears.
2.6 Using the BaroPAM Web(Access log management)
1. Click on the "메뉴(Menu)" button on the top right and then click on the "접속로그 관리(Access Log Management)" menu in the detailed menu to display the "접속로그 목록(Access Log List)" screen as shown below.
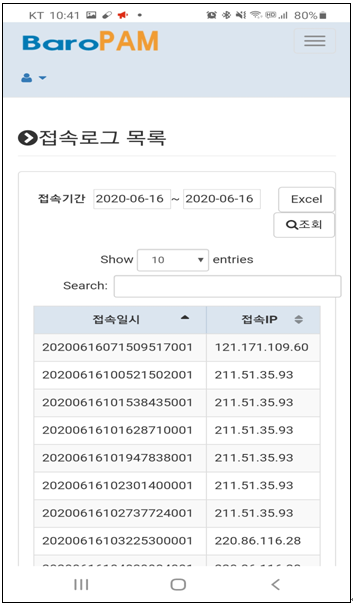
2.7 Using the BaroPAM Web(Abort & Logout)
1. Click the "메뉴(Menu)" button at the top right and then click the "About" menu in the detail menu. The "About" screen appears as follows.
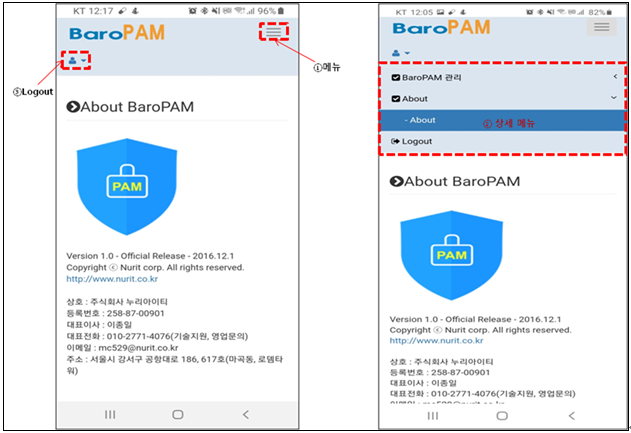
"About" provides an overview of BaroPAM.
Click the "① 메뉴(Menu)" button to display the "② 상세 메뉴(Detailed Menu)" that you can select as shown on the right screen. Click the "③ Logout" button to exit the "BaroPAM" website (www.baropam.com) screen and click. The "Login" screen appears.
3. About BaroKPAM

Version 1.0 - Official Release - 2016.12.1
Copyright ⓒ Nurit corp. All rights reserved.
Company: Nurit Co., Ltd.
Registration Number: 258-87-00901
CEO: Jongil Lee
Tel: +8202-2665-0119(Technical support, sales inquiry)
email: mc529@nurit.co.kr
Address: #913, 15, Magokjungang 2-ro, Gangseo-gu, Seoul (Magok-dong, Magok Techno Tower 2)
'▶ BaroSolution > 가이드' 카테고리의 다른 글
| How to verify the identity of the iPhone when using the BaroPAM app (0) | 2020.12.11 |
|---|---|
| BaroPAM 앱 사용 시 아이폰(iPhone)의 본인확인 방법 (0) | 2020.12.10 |
| 정보자산의 보안강화를 위하여 다계층 인증을 위한 BaroPAM 솔루션의 사용자 가이드(App/Web) (0) | 2020.06.27 |
| 보안 강화를 위한 중간자 공격, 제한된 시간 및 횟수에 의하여 잠금 기능 및 일회용 인증키 검증하는 프로그래밍 가이드 (0) | 2020.05.04 |
| 이상금융거래 탐지/차단을 위한 Fraud Detector 관리 (0) | 2020.02.25 |